crwdns2931527:0crwdnd2931527:0crwdnd2931527:0crwdnd2931527:0crwdne2931527:0
crwdns2935425:01crwdne2935425:0
crwdns2931653:01crwdne2931653:0


-
Connect the two capacitor wires briefly with a pair of metal tweezers to discharge the capacitor. You may see a small spark.
-
Remove eight screws using a Phillips #00 screwdriver.
-
Two (4.31 mm) screws are in the front of the camera.
-
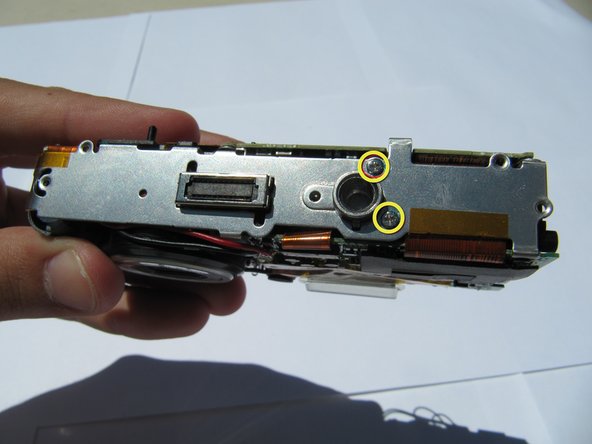
Two (3.30 mm) screws are located in the bottom of the camera.
-
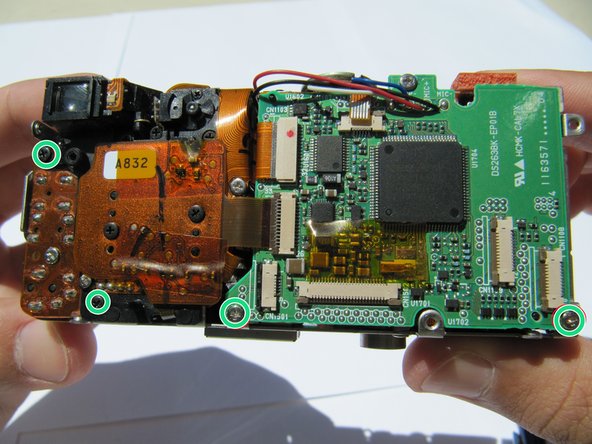
Four (3 x 3.33 mm and 1 x 4.34 mm) screws are in the back of the camera.
| [* icon_caution] The capacitor can store electricity even when the camera is off! Do not touch it until you have safely discharged it. | |
| - | [* blue] Connect the two capacitor wires briefly with a pair of metal tweezers to discharge it. You may see a small spark. |
| - | [* black] Remove 8 screws. |
| - | [* orange] 2 screws in the front (2X 4.31mm). |
| - | [* yellow] 2 screws on the bottom (2X3.30MM). |
| - | [* red] 4 screws in the back (3x 3.33mm, and 1x 4.34mm). |
| + | [* red] Connect the two capacitor wires briefly with a pair of metal [product|IF145-020|tweezers] to discharge the capacitor. You may see a small spark. |
| + | [* black] Remove eight screws using a Phillips #00 screwdriver. |
| + | [* orange] Two (4.31 mm) screws are in the front of the camera. |
| + | [* yellow] Two (3.30 mm) screws are located in the bottom of the camera. |
| + | [* icon_note] This causes the tripod mount on the bottom to become loose. |
| + | [* green] Four (3 x 3.33 mm and 1 x 4.34 mm) screws are in the back of the camera. |
crwdns2944171:0crwdnd2944171:0crwdnd2944171:0crwdnd2944171:0crwdne2944171:0