crwdns2933423:0crwdne2933423:0

Remplacement de la caméra avant du Toshiba Thrive 4G

crwdns2931527:0crwdnd2931527:0crwdnd2931527:0crwdnd2931527:0crwdne2931527:0

crwdns2935425:01crwdne2935425:0

crwdns2936315:0crwdne2936315:0
crwdns2936317:0crwdne2936317:0
crwdns2931653:01crwdne2931653:0
Toshiba Thrive 4G Front Facing Camera Replacement, Remove Inner Casing: crwdns2935265:00crwdnd2935265:01crwdnd2935265:03crwdne2935265:0 Toshiba Thrive 4G Front Facing Camera Replacement, Remove Inner Casing: crwdns2935265:00crwdnd2935265:02crwdnd2935265:03crwdne2935265:0 Toshiba Thrive 4G Front Facing Camera Replacement, Remove Inner Casing: crwdns2935265:00crwdnd2935265:03crwdnd2935265:03crwdne2935265:0
Remove Inner Casing
  • Follow the steps outlined in the battery replacement guide to remove the outer casing, and the battery from their position

  • Locate and remove the 14 screws that are located along the outer edge of the tablet. To do this use the a phillips #0 screwdriver.

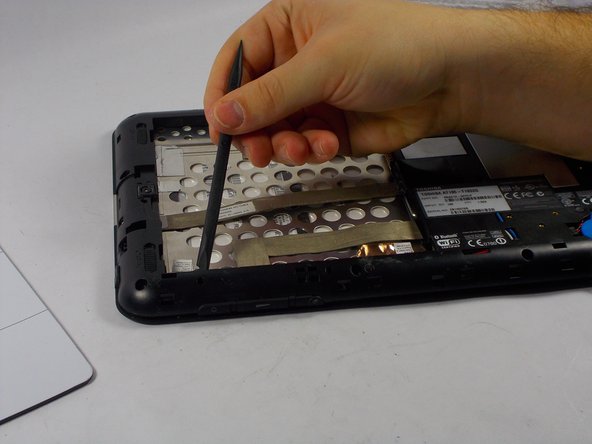
  • Use the pry tool to loosen the bond between the inner casing and the metal shell below the plastic casing. To do this place the pry tool between the two surfaces and push up.

  • Repeat the last step on each side of the tablet

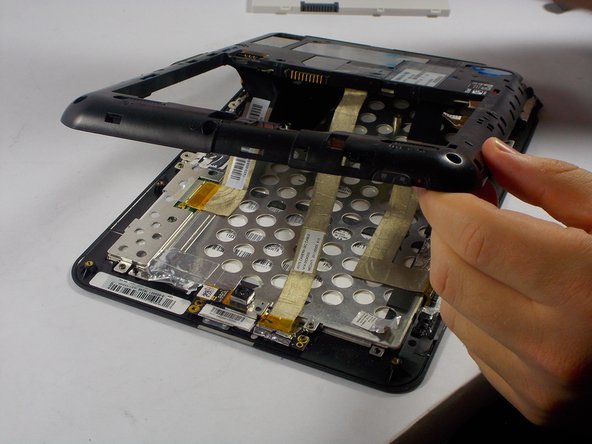
  • When the plastic casing becomes loose enough you can pull it off using your hands

Suivez les étapes décrites dans le guide de remplacement de la batterie pour retirer le boîtier extérieur et la batterie de leur emplacement.

Localisez et retirez les 14 vis situées le long du bord extérieur de la tablette. Pour ce faire, utilisez le tournevis Phillips # 0.

Utilisez l'outil de levier pour desserrer la liaison entre le boîtier interne et la coque métallique située sous le boîtier en plastique. Pour ce faire, placez l'outil de levier entre les deux surfaces et poussez vers le haut.

Répétez la dernière étape de chaque côté de la tablette

Lorsque le boîtier en plastique devient suffisamment lâche, vous pouvez le retirer en utilisant vos mains.

crwdns2944171:0crwdnd2944171:0crwdnd2944171:0crwdnd2944171:0crwdne2944171:0