crwdns2933423:0crwdne2933423:0

Remplacement du haut-parleur du LG Ally VS740

crwdns2935425:05crwdne2935425:0

crwdns2936315:0crwdne2936315:0
crwdns2936317:0crwdne2936317:0
crwdns2931653:05crwdne2931653:0
LG Ally VS740 Speaker Replacement: crwdns2935265:00crwdnd2935265:01crwdnd2935265:03crwdne2935265:0 LG Ally VS740 Speaker Replacement: crwdns2935265:00crwdnd2935265:02crwdnd2935265:03crwdne2935265:0 LG Ally VS740 Speaker Replacement: crwdns2935265:00crwdnd2935265:03crwdnd2935265:03crwdne2935265:0
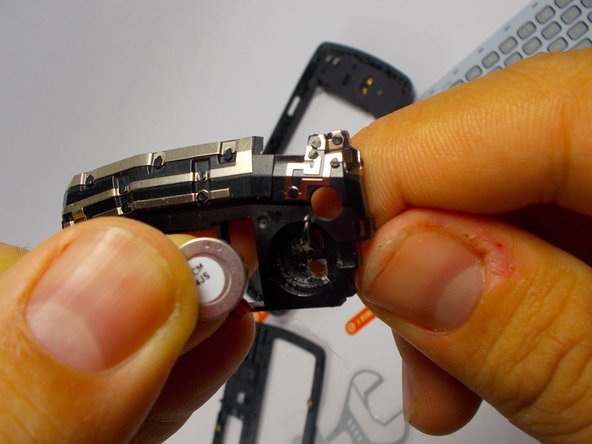
  • Holding the recently removed black casing in your hand notice that silver circular module connected to the casing.

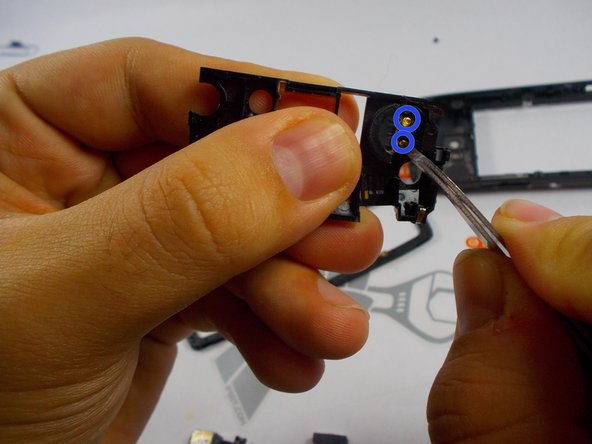
  • Using your prying tool gently press down on one of the golden springs coming out of it. Apply enough pressure so the speaker module is ripped off its sticky foundation.

  • Once this is removed take the new speaker and fit it in at the same place. Be sure to apply a suitable amount of pressure with both finger and thumb to ensure it is stuck to the sticky tape once again.

  • Follow the steps backwards to put the phone back together.

En tenant le boîtier noir récemment retiré dans votre main, remarquez ce module circulaire argenté connecté au boîtier.

À l'aide de votre outil de levier, appuyez doucement sur l'un des ressorts dorés qui en sort. Appliquez suffisamment de pression pour que le module de haut-parleur soit arraché de sa base collante.

Une fois celui-ci retiré, prenez le nouveau haut-parleur et installez-le au même endroit. Assurez-vous d'appliquer une pression appropriée avec le doigt et le pouce pour vous assurer qu'il est à nouveau collé au ruban adhésif.

Suivez les étapes en arrière pour remettre le téléphone en place.

crwdns2944171:0crwdnd2944171:0crwdnd2944171:0crwdnd2944171:0crwdne2944171:0