crwdns2933423:0crwdne2933423:0

Reemplazo de conector de alimentación de la Texas Instruments TI-Nspire CX

crwdns2936315:0crwdne2936315:0
crwdns2936331:0crwdne2936331:0
crwdns2931653:09crwdne2931653:0
Texas Instruments TI-Nspire CX Power Connector Replacement: crwdns2935265:00crwdnd2935265:01crwdnd2935265:03crwdne2935265:0 Texas Instruments TI-Nspire CX Power Connector Replacement: crwdns2935265:00crwdnd2935265:02crwdnd2935265:03crwdne2935265:0 Texas Instruments TI-Nspire CX Power Connector Replacement: crwdns2935265:00crwdnd2935265:03crwdnd2935265:03crwdne2935265:0
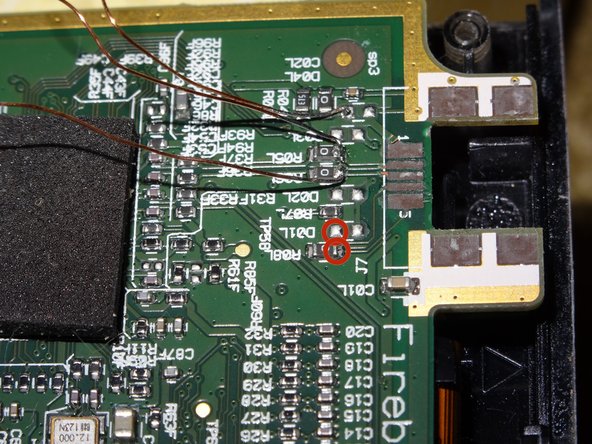
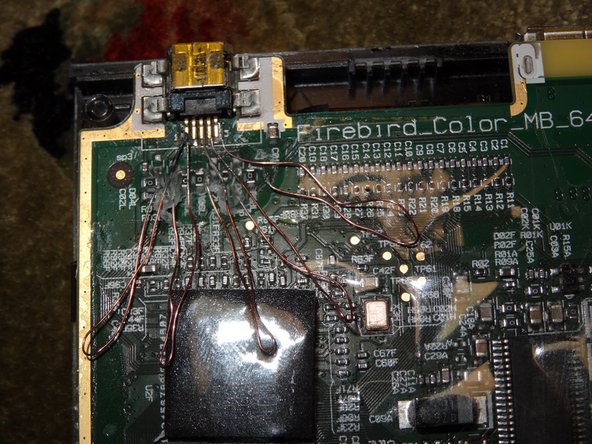
  • Use enameled wire or other types of coated wire.

  • Do NOT use bare copper wire. Although it is used in this tutorial, bare wire can short and permanently brick the calculator.

  • Pre-tin the leads so solder sticks more easily onto the copper. Do this by adding solder to tip of soldering iron, then rubbing across one of the ends of the replacement wire.

  • Do this to both sides of all the wires, tin both the front and back each single end. The tin does not automatically flow to both sides, therefore tediously tin the front, then back of one side of wire.

  • A steady hand helps with soldering to the PCB.

Usa cable esmaltado u otro tipo de cable recubierto.

NO USES cable de cobre descubierto. Aunque sea usado en este tutorial, el cable descubierto puede hacer corto y dañara permanentemente la calculadora.

Pre-estaña los cables para que la soldadura se una más fácilmente al cobre. Haz esto añadiendo soldadura a la punta del cautín, después rozando en una de las puntas del cable de reemplazo.

Haz esto en ambos lados de los cables, estaña el frente y trasero de cada punta. El estaño no fluye automáticamente a ambos lados, así que estaña el frente, luego la parte trasera de un lado del cable.

Un buen pulso ayuda a soldar la PCB.

crwdns2944171:0crwdnd2944171:0crwdnd2944171:0crwdnd2944171:0crwdne2944171:0