crwdns2933423:0crwdne2933423:0

Texas Instruments TI-Nspire CX Power Stecker austauschen

crwdns2936315:0crwdne2936315:0
crwdns2936319:0crwdne2936319:0
crwdns2931653:09crwdne2931653:0
Texas Instruments TI-Nspire CX Power Connector Replacement: crwdns2935265:00crwdnd2935265:01crwdnd2935265:03crwdne2935265:0 Texas Instruments TI-Nspire CX Power Connector Replacement: crwdns2935265:00crwdnd2935265:02crwdnd2935265:03crwdne2935265:0 Texas Instruments TI-Nspire CX Power Connector Replacement: crwdns2935265:00crwdnd2935265:03crwdnd2935265:03crwdne2935265:0
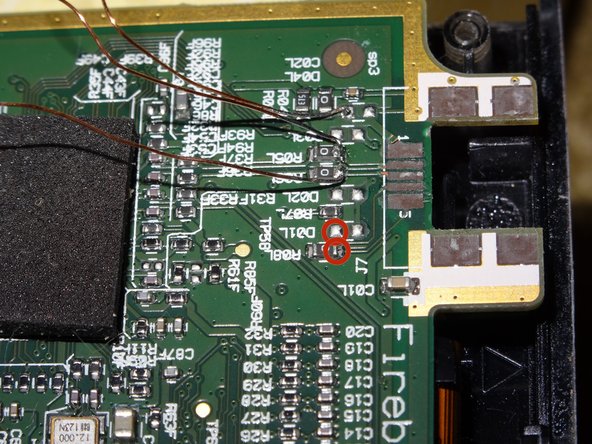
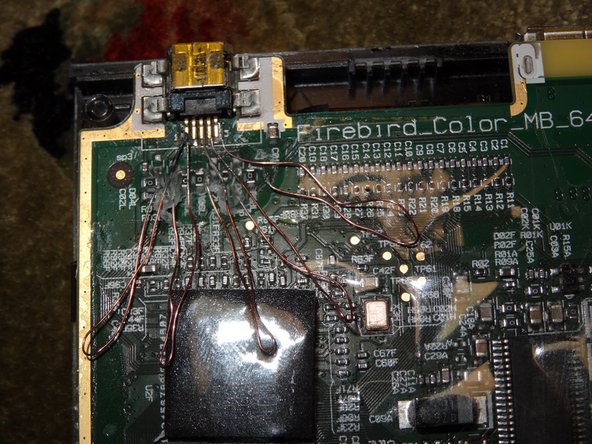
  • Use enameled wire or other types of coated wire.

  • Do NOT use bare copper wire. Although it is used in this tutorial, bare wire can short and permanently brick the calculator.

  • Pre-tin the leads so solder sticks more easily onto the copper. Do this by adding solder to tip of soldering iron, then rubbing across one of the ends of the replacement wire.

  • Do this to both sides of all the wires, tin both the front and back each single end. The tin does not automatically flow to both sides, therefore tediously tin the front, then back of one side of wire.

  • A steady hand helps with soldering to the PCB.

Verwende beschichtetes oder anders isoliertes Kabel.

In dieser Anleitung wird blankes Kupferkabel verwendet. Das ist aber nicht zu empfehlen, da Kurzschlüsse entstehen können, die den Rechner dauerhaft beschädigen.

Behandle die Stellen vorher mit Zinn, damit die Lötstöcke besser am Kupfer kleben. Gib dazu Lötzinn auf die Spitze des Lötkolbens und reibe es dann über eines der Enden des Ersatzkabels.

Mach das auf beiden Seiten aller Kabel, behandle sowohl die Vorder- als auch die Rückseite jedes Endes mit Zinn. Das Zinn fließt nicht automatisch auf beide Seiten, deshalb mühselig zuerst die Vorder-, dann die Rückseite behandeln.

Löte mit ruhiger Hand, wenn du an der Platine arbeitest.

crwdns2944171:0crwdnd2944171:0crwdnd2944171:0crwdnd2944171:0crwdne2944171:0