crwdns2933423:0crwdne2933423:0

Démontage du Uniden EXP 371

crwdns2931529:0crwdnd2931529:0crwdnd2931529:0crwdnd2931529:02crwdnd2931529:0crwdne2931529:0

crwdns2935425:04crwdne2935425:0

crwdns2936315:0crwdne2936315:0
crwdns2936317:0crwdne2936317:0
crwdns2931653:04crwdne2931653:0
Uniden EXP 371 Teardown: crwdns2935265:00crwdnd2935265:01crwdnd2935265:03crwdne2935265:0 Uniden EXP 371 Teardown: crwdns2935265:00crwdnd2935265:02crwdnd2935265:03crwdne2935265:0 Uniden EXP 371 Teardown: crwdns2935265:00crwdnd2935265:03crwdnd2935265:03crwdne2935265:0
  • Your next step is to remove the five screws holding down the motherboard. Use the PH1 philips screwdriver.

  • Once you have removed the five screws you may lift the motherboard off of the front case.

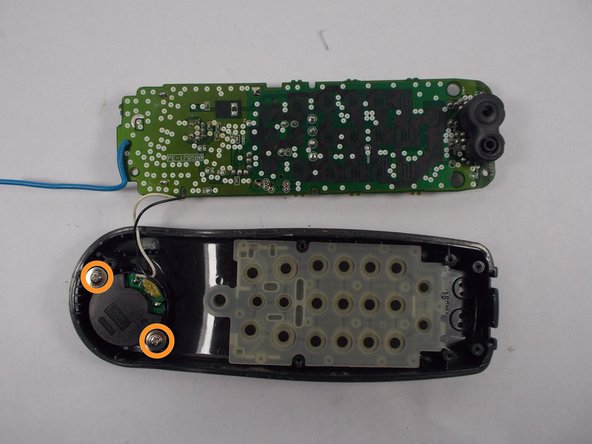
  • At this point you may also remove the dial pad. It simply lifts off.

  • You may also remove the speaker if needed by unscrewing the two screws using the PH1 philips screwdriver.

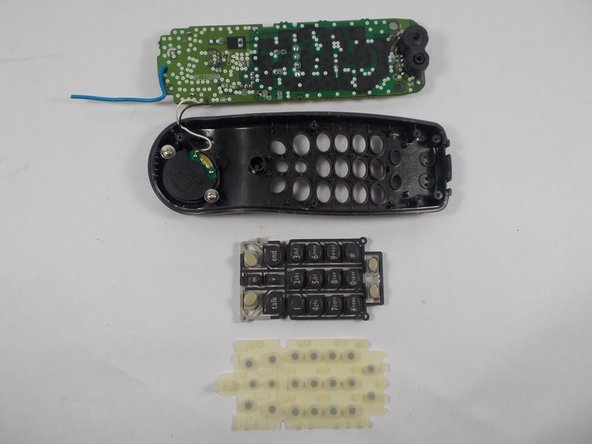
  • The whole phone is now disassembled at this point.

Votre prochaine étape consiste à retirer les cinq vis qui maintiennent la carte mère. Utilisez le tournevis cruciforme PH1.

Une fois que vous avez retiré les cinq vis, vous pouvez retirer la carte mère du boîtier avant.

À ce stade, vous pouvez également retirer le pavé numérique. Il se décolle tout simplement.

Vous pouvez également retirer le haut-parleur si besoin en dévissant les deux vis à l'aide du tournevis cruciforme PH1.

L'ensemble du téléphone est maintenant démonté à ce stade.

crwdns2944171:0crwdnd2944171:0crwdnd2944171:0crwdnd2944171:0crwdne2944171:0