crwdns2933423:0crwdne2933423:0

Nokia Lumia 822 Basic Disassembly

crwdns2936315:0crwdne2936315:0
crwdns2936319:0crwdne2936319:0
crwdns2931653:08crwdne2931653:0
Nokia Lumia 822 Basic Disassembly: crwdns2935265:00crwdnd2935265:01crwdnd2935265:03crwdne2935265:0 Nokia Lumia 822 Basic Disassembly: crwdns2935265:00crwdnd2935265:02crwdnd2935265:03crwdne2935265:0 Nokia Lumia 822 Basic Disassembly: crwdns2935265:00crwdnd2935265:03crwdnd2935265:03crwdne2935265:0
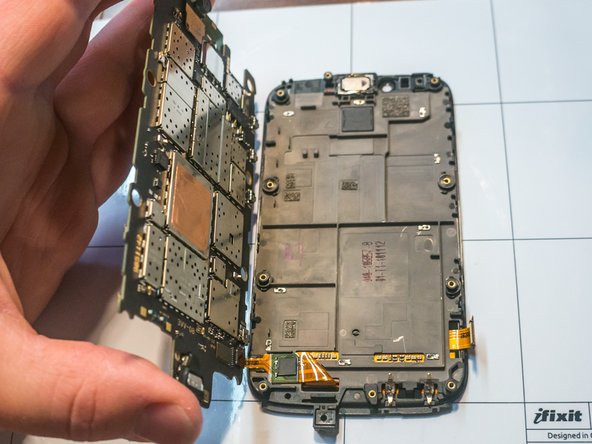
  • Raise the logic board by the edge freed in the previous step, and slide it from underneath the remaining clips on the other side.

  • There is a second ribbon cable directly across from the first, on the underside of the logic board, visible in the last two photos.

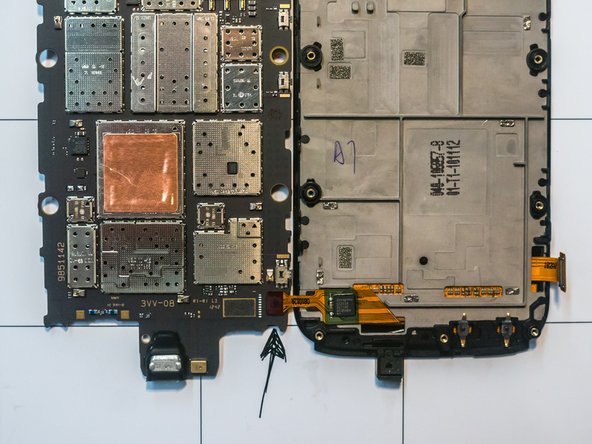
  • Carefully flip the logic board and set it on the workspace next to the screen assembly. Take care to avoid damaging the ribbon cable.

crwdns2935429:0crwdne2935429:0

crwdns2935429:0crwdne2935429:0

crwdns2935429:0crwdne2935429:0

crwdns2944171:0crwdnd2944171:0crwdnd2944171:0crwdnd2944171:0crwdne2944171:0