crwdns2933423:0crwdne2933423:0

Creative Zen MicroPhoto Motherboard Replacement

crwdns2931527:0crwdnd2931527:0crwdnd2931527:0crwdnd2931527:0crwdne2931527:0

crwdns2935425:09crwdne2935425:0

crwdns2936315:0crwdne2936315:0
crwdns2936319:0crwdne2936319:0
crwdns2931653:09crwdne2931653:0
Creative Zen MicroPhoto Motherboard Replacement, Removing the Main Board from the Device: crwdns2935265:00crwdnd2935265:01crwdnd2935265:03crwdne2935265:0 Creative Zen MicroPhoto Motherboard Replacement, Removing the Main Board from the Device: crwdns2935265:00crwdnd2935265:02crwdnd2935265:03crwdne2935265:0 Creative Zen MicroPhoto Motherboard Replacement, Removing the Main Board from the Device: crwdns2935265:00crwdnd2935265:03crwdnd2935265:03crwdne2935265:0
Removing the Main Board from the Device
  • Do not damage the ribbon tab (pictured). It is vital to the device.

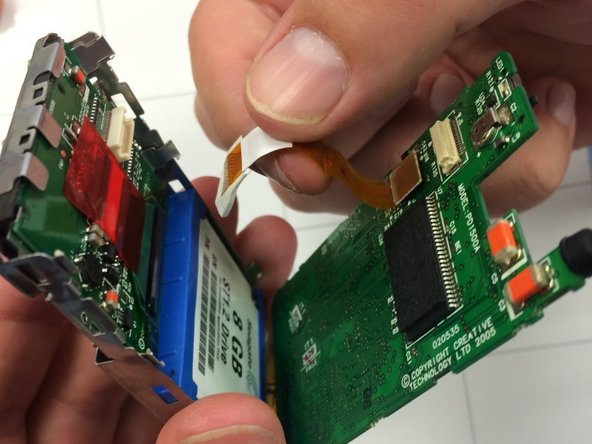
  • Push the ribbon tab (sticking out below the main screen) backward through the square hole to remove the main board of the device.

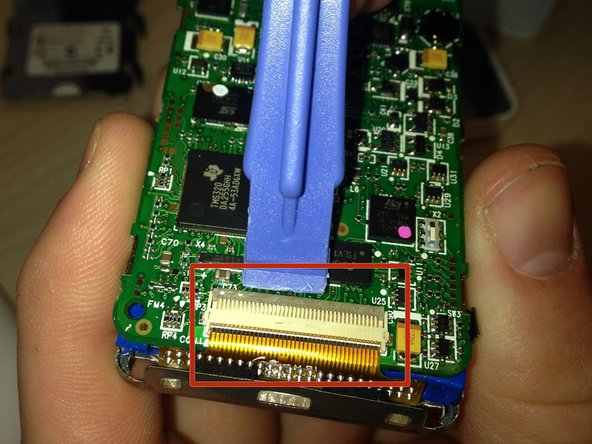
  • Once the wiring is removed from the front panel, release the hinge at the bottom of the device. To do so, gently pry underneath the clip (pictured) with a plastic opening tool. The clip will pop up, and the motherboard can be completely removed.

crwdns2935429:0crwdne2935429:0

crwdns2935429:0crwdne2935429:0

crwdns2935429:0crwdne2935429:0

crwdns2944171:0crwdnd2944171:0crwdnd2944171:0crwdnd2944171:0crwdne2944171:0