crwdns2933423:0crwdne2933423:0

Replacing Panasonic SA-HT810V New Screen, Motherboard, and Power Supply

crwdns2936315:0crwdne2936315:0
crwdns2936325:0crwdne2936325:0
crwdns2931653:010crwdne2931653:0
Replacing Panasonic SA-HT810V New Screen, Motherboard, and Power Supply: crwdns2935265:00crwdnd2935265:01crwdnd2935265:03crwdne2935265:0 Replacing Panasonic SA-HT810V New Screen, Motherboard, and Power Supply: crwdns2935265:00crwdnd2935265:02crwdnd2935265:03crwdne2935265:0 Replacing Panasonic SA-HT810V New Screen, Motherboard, and Power Supply: crwdns2935265:00crwdnd2935265:03crwdnd2935265:03crwdne2935265:0
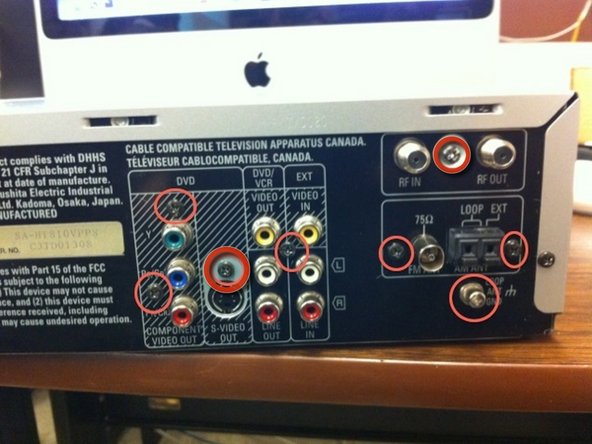
  • Remove the back by removing the nine screws circled in images one and two.

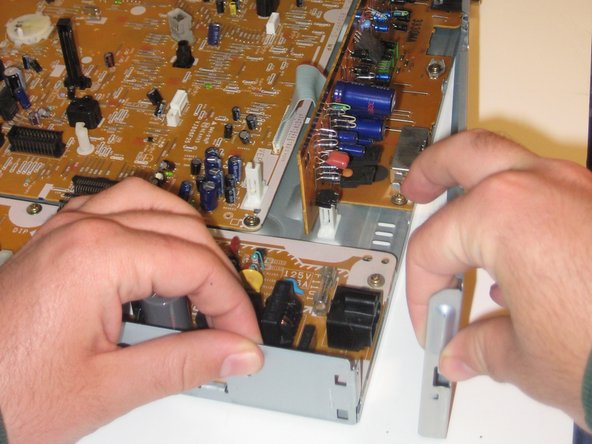
  • Unsnap the tabs as shown in image three and separating it from the main body.

  • You will need to push in the tabs on the sides of the device while removing the back.

crwdns2935429:0crwdne2935429:0

crwdns2935429:0crwdne2935429:0

crwdns2935429:0crwdne2935429:0

crwdns2944171:0crwdnd2944171:0crwdnd2944171:0crwdnd2944171:0crwdne2944171:0