crwdns2933423:0crwdne2933423:0

Replacing Panasonic SA-HT810V New Screen, Motherboard, and Power Supply

crwdns2936315:0crwdne2936315:0
crwdns2936325:0crwdne2936325:0
crwdns2931653:04crwdne2931653:0
Replacing Panasonic SA-HT810V New Screen, Motherboard, and Power Supply: crwdns2935265:00crwdnd2935265:01crwdnd2935265:03crwdne2935265:0 Replacing Panasonic SA-HT810V New Screen, Motherboard, and Power Supply: crwdns2935265:00crwdnd2935265:02crwdnd2935265:03crwdne2935265:0 Replacing Panasonic SA-HT810V New Screen, Motherboard, and Power Supply: crwdns2935265:00crwdnd2935265:03crwdnd2935265:03crwdne2935265:0
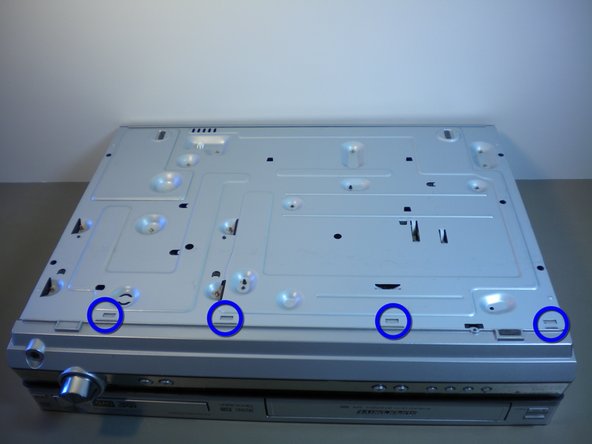
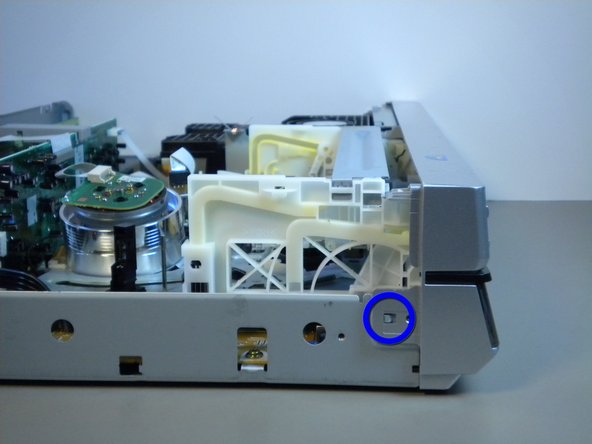
  • To remove the front panel, first locate the nine tabs highlighted in the attached pictures.

  • Note that the tabs holding on the right side of the panel are depicted in step 5

  • Note that before removal there is an electric strip connecting the front pane to the rest of the device.

crwdns2935429:0crwdne2935429:0

crwdns2935429:0crwdne2935429:0

crwdns2935429:0crwdne2935429:0

crwdns2944171:0crwdnd2944171:0crwdnd2944171:0crwdnd2944171:0crwdne2944171:0