crwdns2933423:0crwdne2933423:0

Sostituzione stick analogico sinistro del DualShock 4

crwdns2936315:0crwdne2936315:0
crwdns2936321:0crwdne2936321:0
crwdns2931653:02crwdne2931653:0
DualShock 4 Left Analog Stick Replacement: crwdns2935265:00crwdnd2935265:01crwdnd2935265:03crwdne2935265:0 DualShock 4 Left Analog Stick Replacement: crwdns2935265:00crwdnd2935265:02crwdnd2935265:03crwdne2935265:0 DualShock 4 Left Analog Stick Replacement: crwdns2935265:00crwdnd2935265:03crwdnd2935265:03crwdne2935265:0
  • Once all the contacts are desoldered, the old joystick can be removed. This may take a bit of practice since all the solder will have to be removed. It does help to pull a bit on the joystick while melting the solder and using the wick.

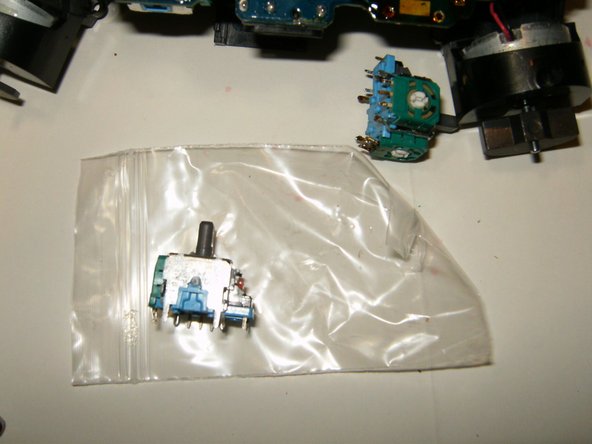
  • Ensure that the contacts of the replacement joystick are identical to the original.

  • Check that all the holes are cleared of old solder. Hypodermic needles as well as very small drill bits can be used to clear the holes. The molten looking substance on the circuit board is the flux used for the desoldering.

Non appena tutti i contatti sarano stati dissaldati il vecchio stick potrà essere rimosso. Potrebbero volerci un po' di tentativi, dal momento che si devono togliere tutti i punti di saldatura. In fase di dissaldatura, può essere utile tirare un po' il joystick.

Assicurati che tutti i contatti dello stick con cui effettuerai la sostituzione siano identici a quello originale.

Controlla anche che tutti i fori siano privi di residui. Per pulire i fori potresti usare sia degli aghi ipodermici sia delle punte da trapano molto sottili. La sostanza fusa che vedi sui circuiti non è che il fluido usato per la dissaldatura.

crwdns2944171:0crwdnd2944171:0crwdnd2944171:0crwdnd2944171:0crwdne2944171:0