crwdns2933423:0crwdne2933423:0

bObsweep Robotic Vacuum Main Board Replacement

crwdns2931529:0crwdnd2931529:0crwdnd2931529:0crwdnd2931529:03crwdnd2931529:0crwdne2931529:0

crwdns2935425:01crwdne2935425:0

crwdns2936315:0crwdne2936315:0
crwdns2936321:0crwdne2936321:0
crwdns2931653:01crwdne2931653:0
bObsweep Robotic Vacuum Main Board  Replacement: crwdns2935265:00crwdnd2935265:01crwdnd2935265:02crwdne2935265:0 bObsweep Robotic Vacuum Main Board  Replacement: crwdns2935265:00crwdnd2935265:02crwdnd2935265:02crwdne2935265:0
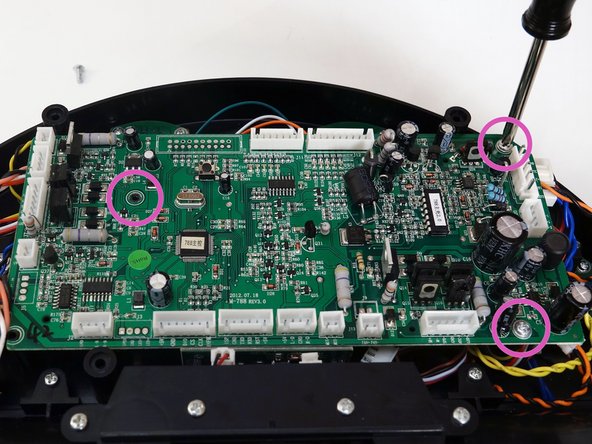
  • After opening bObsweep, you will see the main board in the center. To remove it, you will need to unplug 11 more circuit plugs and uninstall 3 screws.

  • There is one in the centre of the motherboard, near the multicoloured plug for Bob’s left wheel.

  • The second is close to the top right corner.

  • The third is near the bottom right edge.

  • Keep all three screws. They will be needed later while installing the replacement main board.

crwdns2935429:0crwdne2935429:0

crwdns2935429:0crwdne2935429:0

crwdns2935429:0crwdne2935429:0

crwdns2935429:0crwdne2935429:0

crwdns2935429:0crwdne2935429:0

crwdns2944171:0crwdnd2944171:0crwdnd2944171:0crwdnd2944171:0crwdne2944171:0