crwdns2933423:0crwdne2933423:0

Riparazione guarnizione in gomma subwoofer

crwdns2936315:0crwdne2936315:0
crwdns2936321:0crwdne2936321:0
crwdns2931653:06crwdne2931653:0
Subwoofer Rubber Surround Repair: crwdns2935265:00crwdnd2935265:01crwdnd2935265:03crwdne2935265:0 Subwoofer Rubber Surround Repair: crwdns2935265:00crwdnd2935265:02crwdnd2935265:03crwdne2935265:0 Subwoofer Rubber Surround Repair: crwdns2935265:00crwdnd2935265:03crwdnd2935265:03crwdne2935265:0
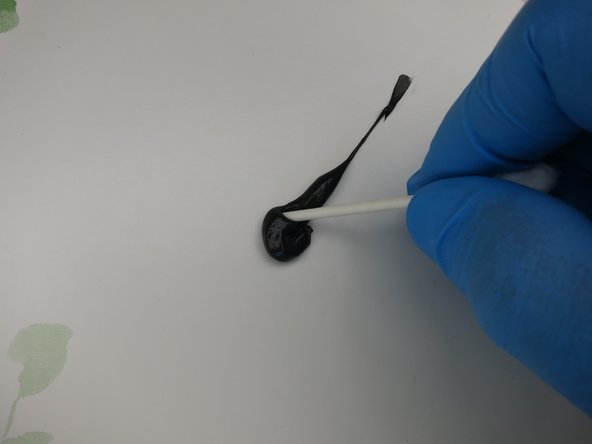
  • Cut the end off a cotton swab in order to transform it into an RTV applicator.

  • Alternatively you can try removing all of the cotton from the swab, but you certainly do not want any cotton fibers to remain on the swab.

  • Dip the swab into the RTV silicone, and use it to apply the RTV silicone to the underside of the subwoofer tear.

  • You do not need a huge amount of RTV silicone on either side of the rubber surround — just enough to form a very thin layer.

Taglia le estremità di un cotton fioc in modo da renderlo un applicatore per silicone RTV.

In alternativa, puoi provare a rimuovere tutto il cotone dall'asticella, ma di sicuro non devi farci rimanere alcuna fibra di cotone.

Immergi l'asticella nel silicone RTV e usala per applicarlo alla parte posteriore dello strappo sul subwoofer.

Non serve molto silicone RTV su nessuno dei due lati della guarnizione in gomma, solo il necessario per formare uno strato molto sottile.

crwdns2944171:0crwdnd2944171:0crwdnd2944171:0crwdnd2944171:0crwdne2944171:0