crwdns2933423:0crwdne2933423:0

iPad Air Wi-Fi 전면 패널 교체

crwdns2931529:0crwdnd2931529:0crwdnd2931529:0crwdnd2931529:076crwdnd2931529:0crwdne2931529:0

crwdns2936315:0crwdne2936315:0
crwdns2936325:0crwdne2936325:0
crwdns2931653:07crwdne2931653:0
iPad Air Wi-Fi Front Panel Replacement: crwdns2935265:00crwdnd2935265:01crwdnd2935265:03crwdne2935265:0 iPad Air Wi-Fi Front Panel Replacement: crwdns2935265:00crwdnd2935265:02crwdnd2935265:03crwdne2935265:0 iPad Air Wi-Fi Front Panel Replacement: crwdns2935265:00crwdnd2935265:03crwdnd2935265:03crwdne2935265:0
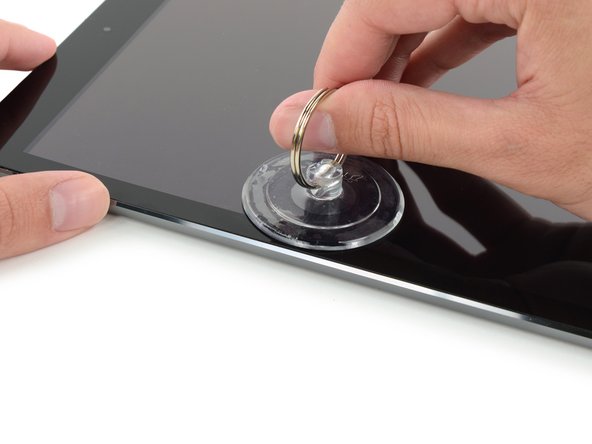
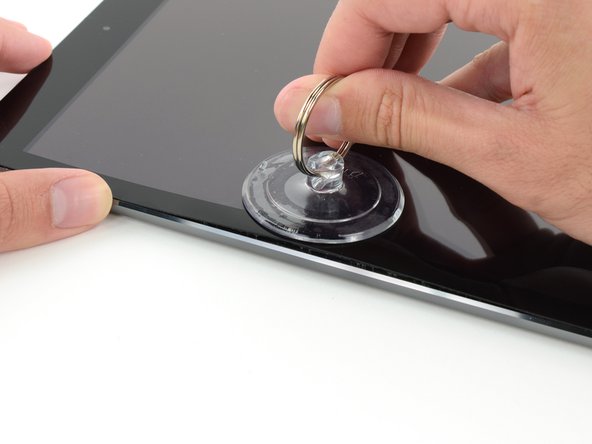
  • Carefully place a suction cup halfway up the heated side.

  • Be sure the cup is completely flat on the screen to get a tight seal.

  • While holding the iPad down with one hand, pull up on the suction cup to slightly separate the front panel glass from from the rear case.

  • If your iPad's screen is badly cracked, covering it with a smooth layer of clear packing tape may help the suction cup adhere. Alternatively, use a strong piece of tape (such as duct tape) and fold it into a handle.

흡착 컵을 가열된 면의 반쯤 위에 조심스럽게 놓으세요.

컵이 스크린에 완전히 평평하게 놓여 있는지 확인하여 단단히 밀착되도록 하세요.

한 손으로 iPad를 잡은 상태에서 흡착 컵을 위로 당겨서 전면 패널 유리를 후면 케이스에서 살짝 분리하세요.

iPad의 스크린에 심하게 깨진 경우 투명 포장 테이프를 붙여 표면을 매끄럽게 하면 흡착 컵이 잘 붙는 데 도움이 될 수 있습니다. 또는 덕트 테이프와 같은 강력한 테이프를 사용하여 손잡이처럼 접어서 사용하세요.

crwdns2944171:0crwdnd2944171:0crwdnd2944171:0crwdnd2944171:0crwdne2944171:0