crwdns2935425:05crwdne2935425:0
crwdns2931653:05crwdne2931653:0


-
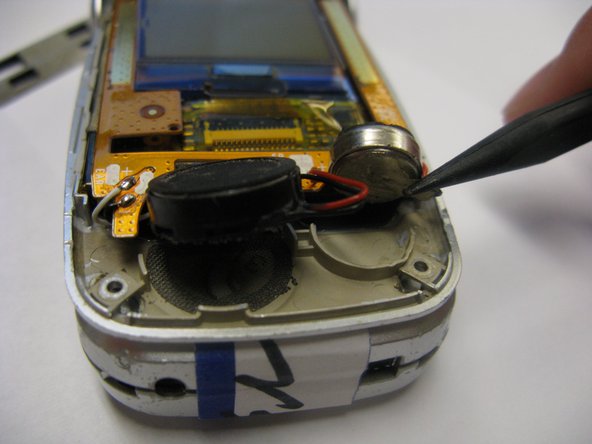
Using the spudger, carefully separate the speaker and microphone from the inside surface of the phone.
| - | [* |
|---|---|
| - | [* black] Using the spudger, carefully separate the |
| - | [* |
| + | [* icon_caution] Do not detach or tear any wires when completing this step. |
| + | [* black] Using the spudger, carefully separate the speaker and microphone from the inside surface of the phone. |
| + | [* icon_note] The smaller black disc is glued down, so you may need to use some force to detach it. Both disks will still remain attached via wires. |
crwdns2944171:0crwdnd2944171:0crwdnd2944171:0crwdnd2944171:0crwdne2944171:0