crwdns2933423:0crwdne2933423:0

Remplacement du lecteur optique du Sony Vaio VGN-FS640

crwdns2936315:0crwdne2936315:0
crwdns2936317:0crwdne2936317:0
crwdns2931653:02crwdne2931653:0
Sony Vaio VGN-FS640 Optical Drive Replacement: crwdns2935265:00crwdnd2935265:01crwdnd2935265:03crwdne2935265:0 Sony Vaio VGN-FS640 Optical Drive Replacement: crwdns2935265:00crwdnd2935265:02crwdnd2935265:03crwdne2935265:0 Sony Vaio VGN-FS640 Optical Drive Replacement: crwdns2935265:00crwdnd2935265:03crwdnd2935265:03crwdne2935265:0
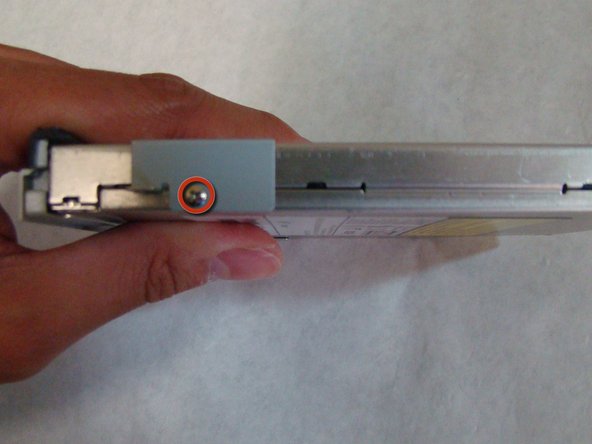
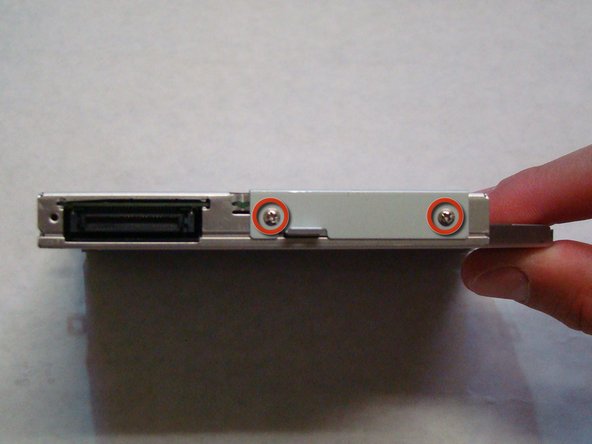
  • Once the drive is removed from the main body of the laptop, you will need to remove the two connecting brackets.

  • Locate the screws for the brackets. There should be one on each side of the drive and two on the end that connects to the computer.

  • Unscrew and remove the brackets.

Une fois le lecteur optique retiré du châssis de l’ordinateur portable, vous devrez retirer les deux supports de fixation.

Repérez les vis des supports. Il doit y en avoir une de chaque côté du lecteur et deux sur l’extrémité qui se fixe à l’ordinateur.

Dévissez et retirez les supports.

crwdns2944171:0crwdnd2944171:0crwdnd2944171:0crwdnd2944171:0crwdne2944171:0