crwdns2933423:0crwdne2933423:0

Sony Vaio VGN-FS640 Optical Drive Replacement

crwdns2936315:0crwdne2936315:0
crwdns2936319:0crwdne2936319:0
crwdns2931653:02crwdne2931653:0
Sony Vaio VGN-FS640 Optical Drive Replacement: crwdns2935265:00crwdnd2935265:01crwdnd2935265:03crwdne2935265:0 Sony Vaio VGN-FS640 Optical Drive Replacement: crwdns2935265:00crwdnd2935265:02crwdnd2935265:03crwdne2935265:0 Sony Vaio VGN-FS640 Optical Drive Replacement: crwdns2935265:00crwdnd2935265:03crwdnd2935265:03crwdne2935265:0
  • Once the drive is removed from the main body of the laptop, you will need to remove the two connecting brackets.

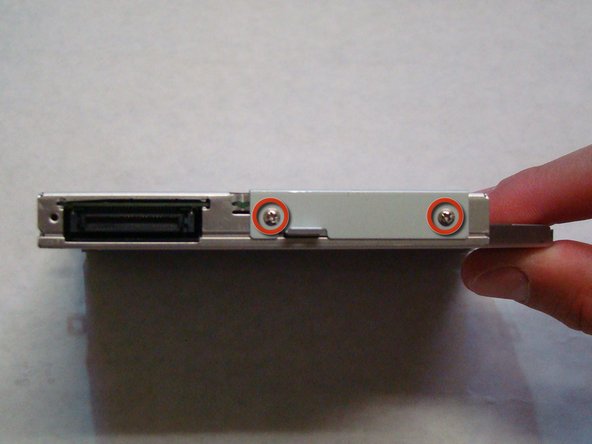
  • Locate the screws for the brackets. There should be one on each side of the drive and two on the end that connects to the computer.

  • Unscrew and remove the brackets.

crwdns2935429:0crwdne2935429:0

crwdns2935429:0crwdne2935429:0

crwdns2935429:0crwdne2935429:0

crwdns2944171:0crwdnd2944171:0crwdnd2944171:0crwdnd2944171:0crwdne2944171:0