crwdns2935425:018crwdne2935425:0
crwdns2931653:018crwdne2931653:0


Microphones & connectors
-
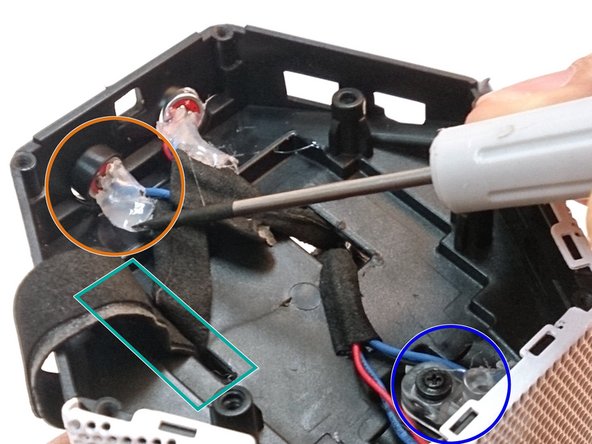
Below the touch panel are FOUR microphones. Not one, not two… FOUR.
-
Remove the adhesive (sigh) around the microphones with a flat-head screwdriver
-
Solvent may be used if the adhesive is too tough to remove.
-
Next, remove the flex connector through the slot.
-
This is the main flex connector that runs from the bottom to the top panel.
-
This is another light guide for the LED that acts as the AXX 200’s Bluetooth indicator.
-
The actual LED is located on the touch panel PCB.
crwdns2944171:0crwdnd2944171:0crwdnd2944171:0crwdnd2944171:0crwdne2944171:0