crwdns2933423:0crwdne2933423:0

Sound BlasterAxx AXX 200 Teardown

crwdns2936315:0crwdne2936315:0
crwdns2936323:0crwdne2936323:0
crwdns2931653:013crwdne2931653:0
Sound BlasterAxx AXX 200 Teardown, Separating PCB stack: audio board: crwdns2935265:00crwdnd2935265:01crwdnd2935265:03crwdne2935265:0 Sound BlasterAxx AXX 200 Teardown, Separating PCB stack: audio board: crwdns2935265:00crwdnd2935265:02crwdnd2935265:03crwdne2935265:0 Sound BlasterAxx AXX 200 Teardown, Separating PCB stack: audio board: crwdns2935265:00crwdnd2935265:03crwdnd2935265:03crwdne2935265:0
Separating PCB stack: audio board
  • Here’s the tough part. Separating the audio board requires some soldering. It also doesn’t help that I have the ugliest soldering iron on the face of the planet.

  • Use a (prettier) soldering iron to melt the solders and remove the four cables connected to the audio board.

  • 3.5 mm Aux-in / Mic-in jack

  • 3.5 mm headphones jack

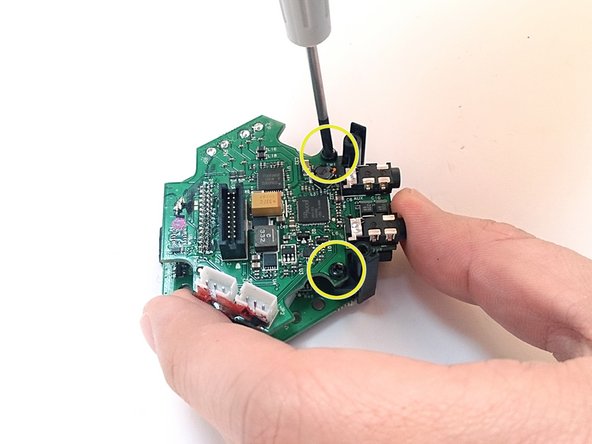
  • Remove the two screws to detach the audio board from the bottom PCB.

  • Warning: There is another cable soldered to the bottom of the audio board. Handle the audio board carefully.

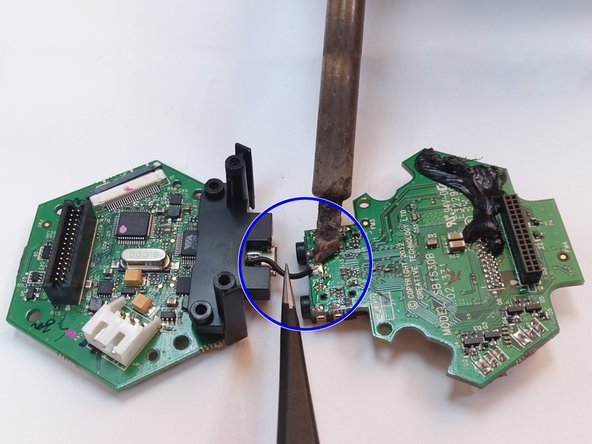
  • Flip the audio board carefully and you will see another cable attached to it below. Using the soldering iron, melt the solder on the audio board to detach the cable.

crwdns2935429:0crwdne2935429:0

crwdns2935429:0crwdne2935429:0

crwdns2935429:0crwdne2935429:0

crwdns2935429:0crwdne2935429:0

crwdns2935429:0crwdne2935429:0

crwdns2935429:0crwdne2935429:0

crwdns2935429:0crwdne2935429:0

crwdns2944171:0crwdnd2944171:0crwdnd2944171:0crwdnd2944171:0crwdne2944171:0