crwdns2935425:010crwdne2935425:0
crwdns2931653:010crwdne2931653:0


Detaching PCB stack
-
There are a total of four PCBs neatly stacked up to fit in the small AXX 200 chamber. It minimizes space. Saved space = bigger audio chamber = better audio.
-
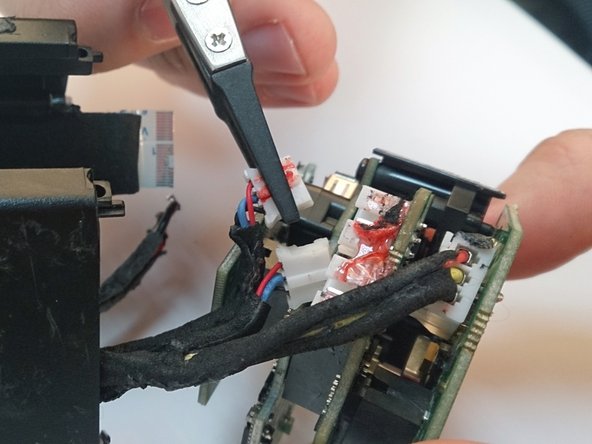
To take out the stack of PCBs, first, disconnect the flex connector with tweezers.
-
After that, disconnect the two connectors. These are probably connected to the microphones at the top.
-
Lastly, disconnect the final connector that is linked to the battery from the bottom PCB.
crwdns2944171:0crwdnd2944171:0crwdnd2944171:0crwdnd2944171:0crwdne2944171:0