crwdns2933423:0crwdne2933423:0

Kunststoff-Druckknöpfe mit einer Handpresse anbringen

crwdns2936315:0crwdne2936315:0
crwdns2936319:0crwdne2936319:0
crwdns2931653:09crwdne2931653:0
Plastic Snap Installation Using a Hand Press, Quality control: crwdns2935265:00crwdnd2935265:01crwdnd2935265:03crwdne2935265:0 Plastic Snap Installation Using a Hand Press, Quality control: crwdns2935265:00crwdnd2935265:02crwdnd2935265:03crwdne2935265:0 Plastic Snap Installation Using a Hand Press, Quality control: crwdns2935265:00crwdnd2935265:03crwdnd2935265:03crwdne2935265:0
Quality control
  • Remove the garment from the press and check that the new snap clicks into the opposing side.

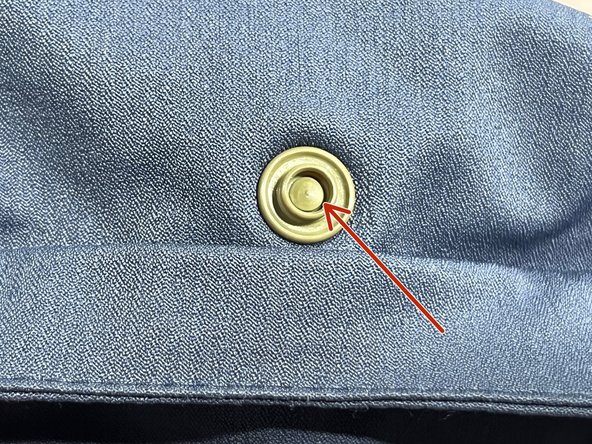
  • A properly secured snap will flatten the cap post into the socket/stud piece. Depending on the type of snap dies used, this will produce one of two outcomes:

  • Three concentric circles visible at the center of the snap (reference image #2)

  • A mushroom dome shape at the center of the snap (reference image #3)

  • If the snap spins in place, the snap isn't secure. Repeat the previous step.

  • If you're replacing both sides of the snap, repeat these steps on the other side, ensuring all the proper dies and pieces are used.

Nimm das Kleidungsstück aus der Presse und prüfe, ob der neue Druckknopf in die gegenüberliegende Seite einrastet.

Bei einem richtig eingesetzter Druckknopfs drückt den Stift flach in das Gegenstück hinein. Je nach Art des verwendeten Druckknopfteils siehst du entweder:

Drei konzentrische Kreise in der Mitte des Druckknopfs (Referenzbild #2) oder

Eine pilzförmige Wölbung in der Mitte des Druckknopfs (Referenzbild #3)

Wenn sich der Druckknopf dreht, ist er nicht richtig fest. Wiederhole den vorherigen Schritt.

Wenn du beide Teile des Druckknopfs ersetzt, wiederhole diese Schritte auf der anderen Seite und achte darauf, dass du jeweils die richtigen Halterungen und Teile verwendest.

crwdns2944171:0crwdnd2944171:0crwdnd2944171:0crwdnd2944171:0crwdne2944171:0