crwdns2933423:0crwdne2933423:0

ニンテンドーDS Liteの下部ケース取り外し

crwdns2931529:0crwdnd2931529:0crwdnd2931529:0crwdnd2931529:09crwdnd2931529:0crwdne2931529:0

crwdns2935425:04crwdne2935425:0

crwdns2936315:0crwdne2936315:0
crwdns2936323:0crwdne2936323:0
crwdns2931653:04crwdne2931653:0
Disassembling Nintendo DS Lite Bottom Case: crwdns2935265:00crwdnd2935265:01crwdnd2935265:03crwdne2935265:0 Disassembling Nintendo DS Lite Bottom Case: crwdns2935265:00crwdnd2935265:02crwdnd2935265:03crwdne2935265:0 Disassembling Nintendo DS Lite Bottom Case: crwdns2935265:00crwdnd2935265:03crwdnd2935265:03crwdne2935265:0
  • Carefully separate the two pieces by hand.

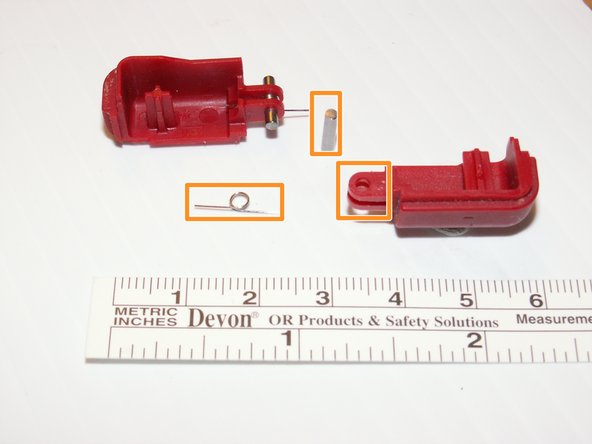
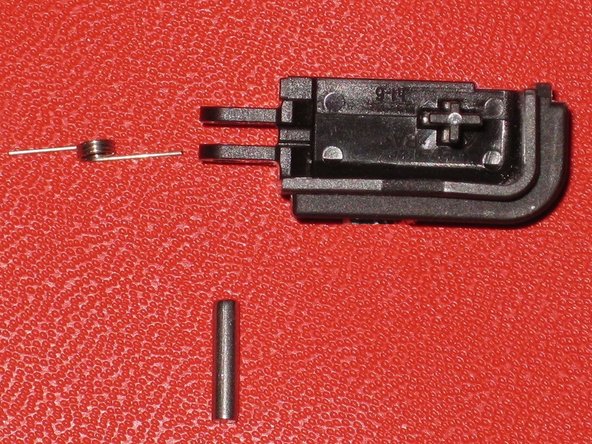
  • The two shoulder buttons are made up of three pieces -- the plastic button, a pin, and a spring. If they accidentally pop out while you are working, study the picture and make sure you put the spring in the correct position.

  • When reassembling the cover, make sure that the power switch caver on the bottom case is in the off (down) position to avoid breakage.

手を使って、慎重に2つの部分を切り離します。

肩にある2つのボタンは3つの部品で構成されています。ブラスチック製のボタン、ピン、及びバネです。作業の際に誤ってこれらの部品が飛び出してしまった場合、画像を確認してバネを正しい位置に取り付けて下さい。

カバーを取り付け直す際は、下部ケースにある電源スイッチカバーを必ずOFF(下)の位置にして、破損を防いで下さい。

crwdns2944171:0crwdnd2944171:0crwdnd2944171:0crwdnd2944171:0crwdne2944171:0