crwdns2933423:0crwdne2933423:0

Desmontaje de la cubierta inferior de una Nintendo DS Lite

crwdns2931529:0crwdnd2931529:0crwdnd2931529:0crwdnd2931529:09crwdnd2931529:0crwdne2931529:0

crwdns2935425:04crwdne2935425:0

crwdns2936315:0crwdne2936315:0
crwdns2936331:0crwdne2936331:0
crwdns2931653:04crwdne2931653:0
Disassembling Nintendo DS Lite Bottom Case: crwdns2935265:00crwdnd2935265:01crwdnd2935265:03crwdne2935265:0 Disassembling Nintendo DS Lite Bottom Case: crwdns2935265:00crwdnd2935265:02crwdnd2935265:03crwdne2935265:0 Disassembling Nintendo DS Lite Bottom Case: crwdns2935265:00crwdnd2935265:03crwdnd2935265:03crwdne2935265:0
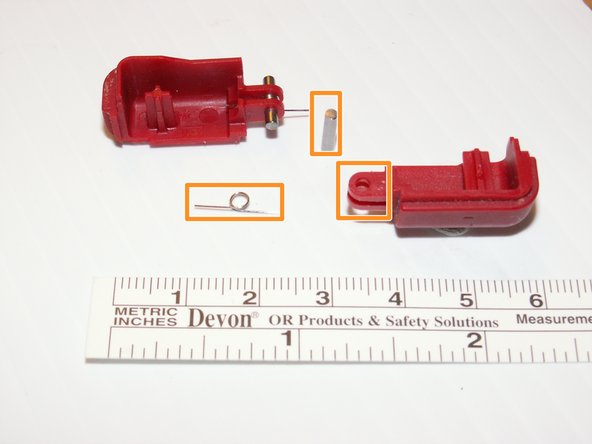
  • Carefully separate the two pieces by hand.

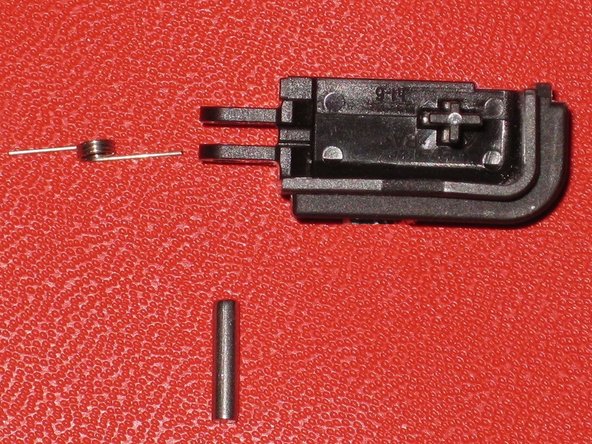
  • The two shoulder buttons are made up of three pieces -- the plastic button, a pin, and a spring. If they accidentally pop out while you are working, study the picture and make sure you put the spring in the correct position.

  • When reassembling the cover, make sure that the power switch caver on the bottom case is in the off (down) position to avoid breakage.

Separa con cuidado las dos piezas a mano.

Los dos botones laterales se componen de tres piezas: el botón de plástico, un alfiler y un resorte. Si saltan accidentalmente mientras estás trabajando, estudia la imagen y asegúrate de colocar el resorte en la posición correcta.

Al volver a montar la cubierta, asegúrate de que el interruptor de encendido en la parte inferior de la caja esté en la posición de apagado (hacia abajo) para evitar roturas.

crwdns2944171:0crwdnd2944171:0crwdnd2944171:0crwdnd2944171:0crwdne2944171:0