crwdns2933423:0crwdne2933423:0

Reemplazo de teclado para MacBook Air de 13 pulgadas (finales de 2010)

crwdns2935425:07crwdne2935425:0

crwdns2936315:0crwdne2936315:0
crwdns2936331:0crwdne2936331:0
crwdns2931653:07crwdne2931653:0
MacBook Air 13" Late 2010 Keyboard Replacement, Installing the backlight: crwdns2935265:00crwdnd2935265:01crwdnd2935265:03crwdne2935265:0 MacBook Air 13" Late 2010 Keyboard Replacement, Installing the backlight: crwdns2935265:00crwdnd2935265:02crwdnd2935265:03crwdne2935265:0 MacBook Air 13" Late 2010 Keyboard Replacement, Installing the backlight: crwdns2935265:00crwdnd2935265:03crwdnd2935265:03crwdne2935265:0
Installing the backlight
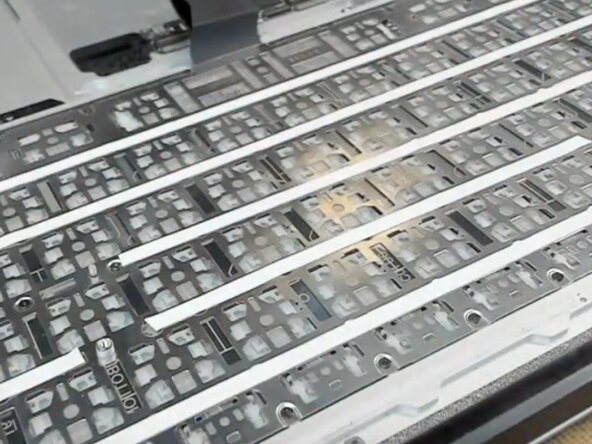
  • Once we are satisfied with the keyboards fit and there are no sticky keys, especially the top rows smaller function keys, as they are the ones that are most common to do so if ever, we can now prepare to install the old or a new backlight to the casing.

  • It is actually possible to change the color of your backlight at this stage by inserting a thin plastic covering layer between the backlight and the middle clear plastic. Colored bin liner (Trash can bags) work well as they are thin enough not to absolve to much light. Various colors are available at the local convenience store or supermarket.

  • Using the 3M tape carefully go around the edges where the old tape was leaving as less space as possible, this will help in case of any dirt, dust or worst case scenario of a water spill getting inside and onto the logic board, or at least it will help to minimize that risk.

  • A new backlight usually comes with adhesive tape preinstalled, if so there will be no need to use the 3M tape,

  • It is also possible to customize the backlight color by adding a thin layer of transparent colored plastic replacing the existing clear panel or overlaying it, this will work well as long as they are thin enough not to absolve to much light.

  • You can also apply the tape covering all the screws along the center rows, but do not peel back to expose the sticky surface otherwise you will have trouble positioning the backlight! This will just help to contain any screw that may decide to come lose and wedging itself under a key!

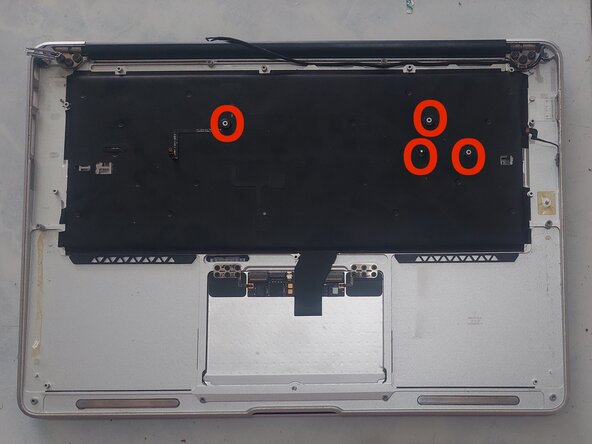
  • Gently put the backlight in its correct alignment and position, making sure that it is laying nicely flat and even, observing that the 4 alignment lugs or mounts for the logic board are not covered, then gently run your finger around the edges of the backlight pushing it down to firmly secure it to the case.

  • Once you are satisfied that everything is nice and secure, we are now ready to re-assemble the laptop. Job done.

Una vez que estemos satisfechos con el ajuste del teclado y no haya teclas pegajosas, especialmente las teclas de función más pequeñas de las filas superiores, ya que son las que más comúnmente lo hacen, ahora podemos prepararnos para instalar la retroiluminación antigua o una nueva en la carcasa.

Es posible cambiar el color de la retroiluminación en esta etapa insertando una fina capa de plástico entre la retroiluminación y el plástico transparente central. Las bolsas de basura de colores funcionan bien, ya que son lo suficientemente delgadas como para no absorber mucha luz. Hay varios colores en tiendas de conveniencia o supermercados.

Usando la cinta 3M con cuidado, recorra los bordes donde estaba la cinta vieja dejando el menor espacio posible, esto ayudará en caso de que entre suciedad, polvo o, en el peor de los casos, un derrame de agua en la placa lógica, o al menos ayudará a minimizar ese riesgo.

Una nueva luz de fondo generalmente viene con cinta adhesiva preinstalada, de ser así no será necesario usar la cinta 3M,

También es posible personalizar el color de la luz de fondo agregando una capa delgada de plástico de color transparente que reemplace el panel transparente existente o superponiéndolo, esto funcionará bien siempre que sean lo suficientemente delgadas como para no absorber demasiada luz.

También puedes aplicar la cinta adhesiva que cubre todos los tornillos de las filas centrales, pero no la despegues para exponer la superficie adhesiva; de lo contrario, tendrás problemas para colocar la retroiluminación. Esto ayudará a contener cualquier tornillo que se afloje y se quede atascado debajo de una llave.

Coloque con cuidado la luz de fondo en su alineación y posición correctas, asegurándose de que quede bien plana y uniforme, observando que las 4 orejetas de alineación o soportes para la placa lógica no estén cubiertos, luego pase suavemente el dedo alrededor de los bordes de la luz de fondo empujándola hacia abajo para asegurarla a la carcasa.

Una vez que esté seguro de que todo está en orden, podemos volver a ensamblar la computadora portátil. ¡Listo!

crwdns2944171:0crwdnd2944171:0crwdnd2944171:0crwdnd2944171:0crwdne2944171:0