crwdns2933423:0crwdne2933423:0

Reemplazo de teclado para MacBook Air de 13 pulgadas, principios de 2015

crwdns2936315:0crwdne2936315:0
crwdns2936331:0crwdne2936331:0
crwdns2931653:04crwdne2931653:0
MacBook Air 13" Early 2015 Keyboard Replacement, Removing the keyboard: crwdns2935265:00crwdnd2935265:01crwdnd2935265:03crwdne2935265:0 MacBook Air 13" Early 2015 Keyboard Replacement, Removing the keyboard: crwdns2935265:00crwdnd2935265:02crwdnd2935265:03crwdne2935265:0 MacBook Air 13" Early 2015 Keyboard Replacement, Removing the keyboard: crwdns2935265:00crwdnd2935265:03crwdnd2935265:03crwdne2935265:0
Removing the keyboard
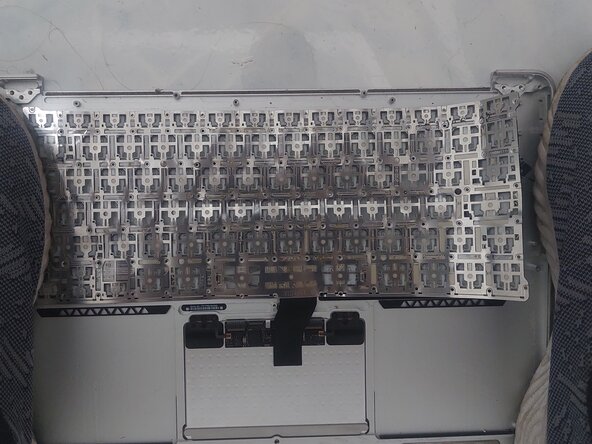
  • Once all of the screws are removed we are almost ready to remove the keyboard. We DO NOT want to bend the top case in any way shape or form, so we will FIRMLY STAND on the edges to prevent it lifting or moving as this could bend or deform the case which of course we do not want to happen.

  • It is STRONGLY advised to to put on a good pair of strong thick gloves so we can first lift up the edge of the keyboard and gently bend it back enough to get a good strong grip on it. The edges of the Keyboard are VERY SHARP and will easily slice through weak materials or skin, so EXTRA CAUTION is required.

  • You can alternatively just use an old rag or a thick strong cloth to protect yourself against what can be potentially severe cuts to your fingers and knuckles when removing the keyboard.

  • It is a good idea also to remove as many key caps as possible including their fixtures beforehand as it is always good to have some spares of these, especially if you are into repairing apple laptops or just in case your new keyboard suffers a damaged key in the future, as they will fly off everywhere when removing the keyboard.

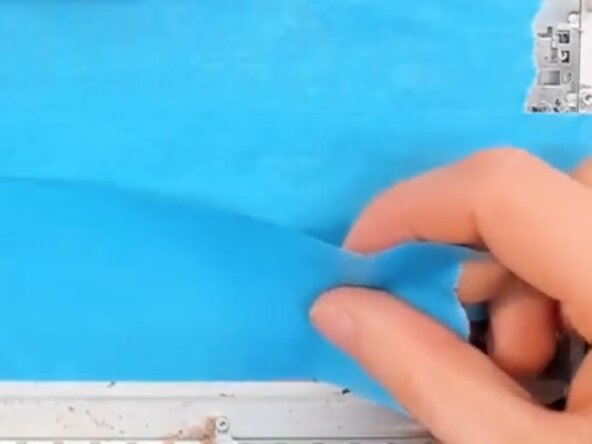
  • You can also put a sheet of paper or plastic under the laptop to help prevent any scratches that may occur if the case moves during the big pull, a cloth or rag will allow some flex during the violent pulling away of the keyboard which can potentially disfigure the case, something we definitely need to avoid from happening.

  • Use can use some masking tape to completely cover the backside of the keyboard as this can help to catch all the rivet bits that will pop off when tearing out the keyboard.

  • Once you are set, get a TIGHT FIRM GRIP and just count to three.... 1-2-3 & RIP IT OUT in one go as fast as you can. Keys and rivets will fly everywhere so be prepared! The slower you do it the more chance there is of bending the casing or injury. Again, the edge of the keyboard is VERY SHARP and shows no mercy to hands & fingers.

  • Try not to pull upwards to much, instead pull at a level to the keyboard, as this will reduce upward stress on the case.

Una vez quitados todos los tornillos, estamos casi listos para retirar el teclado. No queremos doblar la carcasa superior de ninguna manera, así que nos apoyaremos firmemente en los bordes para evitar que se levante o se mueva, ya que esto podría doblarla o deformarla, lo cual, por supuesto, no queremos que suceda.

Se recomienda encarecidamente usar guantes gruesos y resistentes para poder levantar primero el borde del teclado y doblarlo suavemente hacia atrás lo suficiente como para sujetarlo firmemente. Los bordes del teclado son muy afilados y pueden cortar fácilmente materiales frágiles o la piel, por lo que se requiere EXTRA PRECAUCIÓN.

También puedes utilizar un trapo viejo o un paño grueso y resistente para protegerte de posibles cortes graves en los dedos y nudillos al retirar el teclado.

También es mejor quitar tantas teclas como sea posible, incluidos sus accesorios de antemano, ya que siempre es bueno tener algunos repuestos de estas, especialmente si se dedica a reparar portátiles Apple o simplemente en caso de que su nuevo teclado sufra una tecla dañada en el futuro, ya que volarán por todas partes al quitar el teclado.

También puede colocar un papel o plástico debajo del portátil para ayudar a prevenir cualquier rasguño que pueda ocurrir si la carcasa se mueve durante el tirón fuerte, un paño o trapo permitirá flexibilidad durante el tirón violento del teclado que potencialmente puede desfigurar el estuche, algo que definitivamente debemos evitar que suceda.

Puedes usar un poco de cinta de enmascarar para cubrir completamente la parte trasera del teclado, ya que esto puede ayudar a atrapar todos los trozos de remache que se desprenderán al arrancar el teclado.

Una vez listo, agárralo con fuerza y ​​cuenta hasta tres .y sácalo de un tirón muy rápido. ¡Las teclas y los remaches volarán por todas partes, así que prepárate! Cuanto más lento lo hagas, más probabilidades hay de doblar la carcasa o lesionarte. Recuerda, el borde del teclado es MUY AFILADO y no tolera las manos ni los dedos.

Intente no tirar demasiado hacia arriba, en lugar de eso tire a un nivel del teclado, ya que esto reducirá la tensión hacia arriba en la carcasa.

crwdns2944171:0crwdnd2944171:0crwdnd2944171:0crwdnd2944171:0crwdne2944171:0