crwdns2935425:013crwdne2935425:0


-
NEW BUTTON SIZE: If attaching a new button, test that it fits through the buttonhole before attaching it. The perfect sized button has a diameter that's 1/8 inch (~3 mm) smaller than the length of the buttonhole.
-
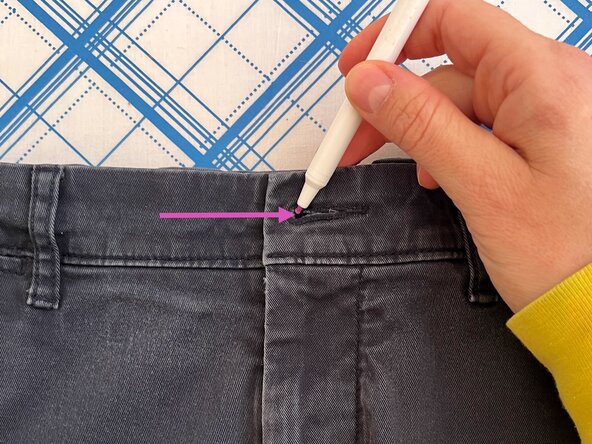
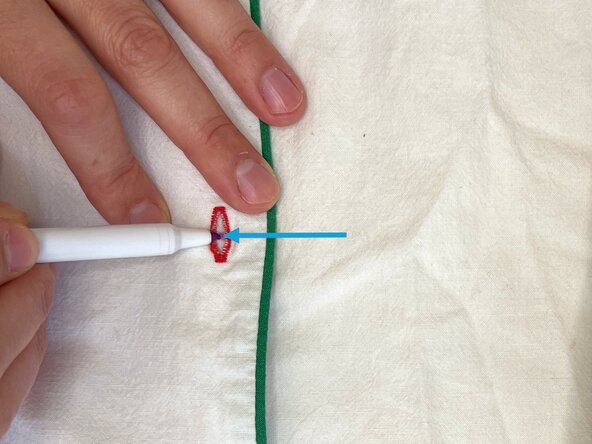
PLACING BUTTON: To mark the placement of a button without a guide or remnant stitches to follow, position the fabric pieces as they would sit if the button was fastened, then:
-
Horizontal Buttonhole - Slide the heat-erasable pen through the buttonhole at the end closer to the fabric edge and make a mark onto the fabric underneath. This will be the placement for the the new button.
-
Vertical Buttonhole - Slide the heat-erasable pen through the buttonhole at the exact center and make a mark onto the fabric underneath. This will be the placement for the the new button.
crwdns2944171:0crwdnd2944171:0crwdnd2944171:0crwdnd2944171:0crwdne2944171:0