crwdns2933423:0crwdne2933423:0

HP EliteBook 840 G7/Aero G8 디스플레이 패널 분리

crwdns2931529:0crwdnd2931529:0crwdnd2931529:0crwdnd2931529:05crwdnd2931529:0crwdne2931529:0

crwdns2936315:0crwdne2936315:0
crwdns2936325:0crwdne2936325:0
crwdns2931653:05crwdne2931653:0
HP EliteBook 840 G7/Aero G8 Display Panel Removal, Remove the bezel: crwdns2935265:00crwdnd2935265:01crwdnd2935265:03crwdne2935265:0 HP EliteBook 840 G7/Aero G8 Display Panel Removal, Remove the bezel: crwdns2935265:00crwdnd2935265:02crwdnd2935265:03crwdne2935265:0 HP EliteBook 840 G7/Aero G8 Display Panel Removal, Remove the bezel: crwdns2935265:00crwdnd2935265:03crwdnd2935265:03crwdne2935265:0
Remove the bezel
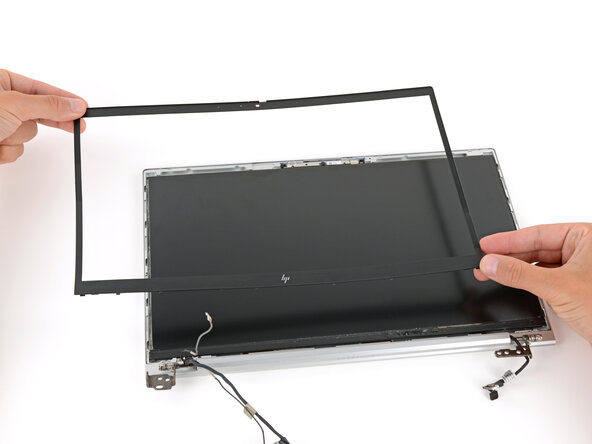
  • Once a portion of the bezel lifts to where you can grip it with your fingers, peel the bezel up around the entire perimeter, using the spudger to separate any sections still adhered.

  • Remove the plastic bezel.

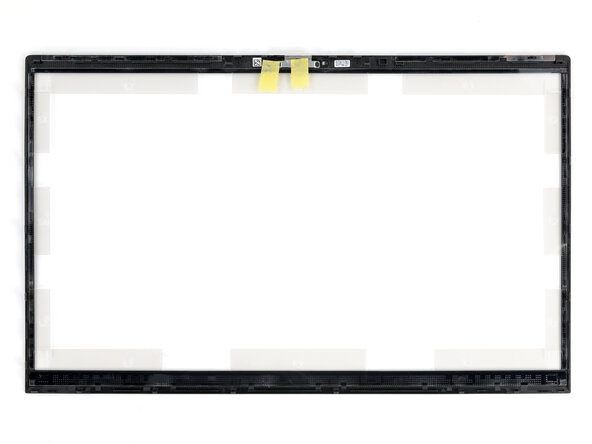
  • During reassembly, make sure to remove all the plastic liners and pieces of tape from your replacement bezel. Check thoroughly around the entire perimeter.

베젤의 일부가 손가락으로 잡을 수 있는 높이까지 들리면 스퍼저를 사용하여 전체 둘레에서 베젤을 벗겨내고 아직 붙어 있는 부분을 분리하세요.

플라스틱 베젤을 분리하세요.

재조립할 때는 교체용 베젤에서 플라스틱 라이너와 테이프 조각을 모두 분리해야 합니다. 둘레 전체를 꼼꼼히 살펴보세요.

crwdns2944171:0crwdnd2944171:0crwdnd2944171:0crwdnd2944171:0crwdne2944171:0