crwdns2933423:0crwdne2933423:0

Extracción del panel de visualización del HP EliteBook 840 G7/Aero G8

crwdns2931529:0crwdnd2931529:0crwdnd2931529:0crwdnd2931529:05crwdnd2931529:0crwdne2931529:0

crwdns2936315:0crwdne2936315:0
crwdns2936331:0crwdne2936331:0
crwdns2931653:05crwdne2931653:0
HP EliteBook 840 G7/Aero G8 Display Panel Removal, Remove the bezel: crwdns2935265:00crwdnd2935265:01crwdnd2935265:03crwdne2935265:0 HP EliteBook 840 G7/Aero G8 Display Panel Removal, Remove the bezel: crwdns2935265:00crwdnd2935265:02crwdnd2935265:03crwdne2935265:0 HP EliteBook 840 G7/Aero G8 Display Panel Removal, Remove the bezel: crwdns2935265:00crwdnd2935265:03crwdnd2935265:03crwdne2935265:0
Remove the bezel
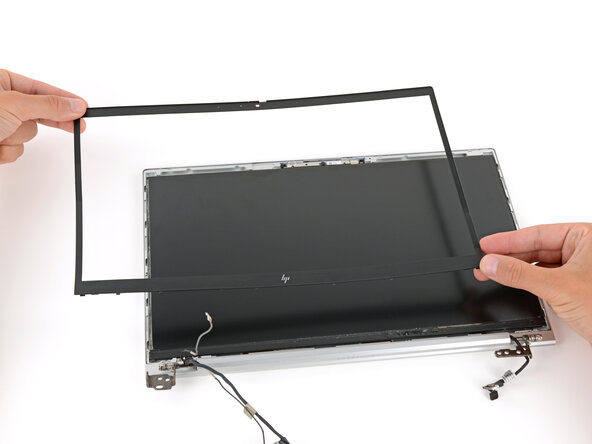
  • Once a portion of the bezel lifts to where you can grip it with your fingers, peel the bezel up around the entire perimeter, using the spudger to separate any sections still adhered.

  • Remove the plastic bezel.

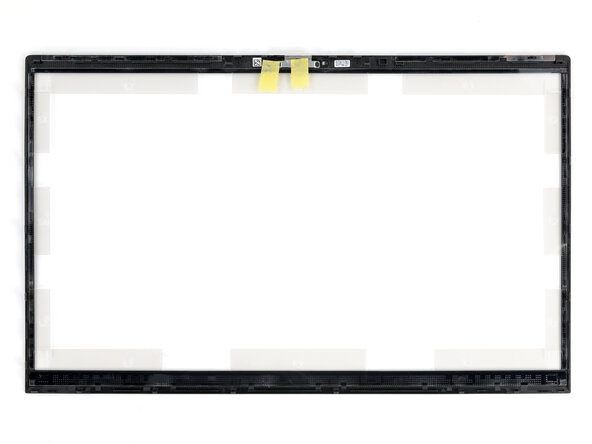
  • During reassembly, make sure to remove all the plastic liners and pieces of tape from your replacement bezel. Check thoroughly around the entire perimeter.

Una vez que una parte del bisel se levante lo suficiente como para poder agarrarlo con los dedos, despega el bisel por todo el perímetro, usando el spudger para separar cualquier sección que aún esté adherida.

Quita el bisel de plástico.

Durante el reensamblaje, asegúrate de quitar todos los revestimientos de plástico y trozos de cinta adhesiva del bisel de reemplazo. Revisa minuciosamente todo el perímetro.

crwdns2944171:0crwdnd2944171:0crwdnd2944171:0crwdnd2944171:0crwdne2944171:0