crwdns2933423:0crwdne2933423:0

Sostituzione della scheda di imaging principale Nikon D850

crwdns2936315:0crwdne2936315:0
crwdns2936321:0crwdne2936321:0
crwdns2931653:08crwdne2931653:0
Nikon D850 Main Imaging Board Replacement, Connector disconnection: crwdns2935265:00crwdnd2935265:01crwdnd2935265:03crwdne2935265:0 Nikon D850 Main Imaging Board Replacement, Connector disconnection: crwdns2935265:00crwdnd2935265:02crwdnd2935265:03crwdne2935265:0 Nikon D850 Main Imaging Board Replacement, Connector disconnection: crwdns2935265:00crwdnd2935265:03crwdnd2935265:03crwdne2935265:0
Connector disconnection
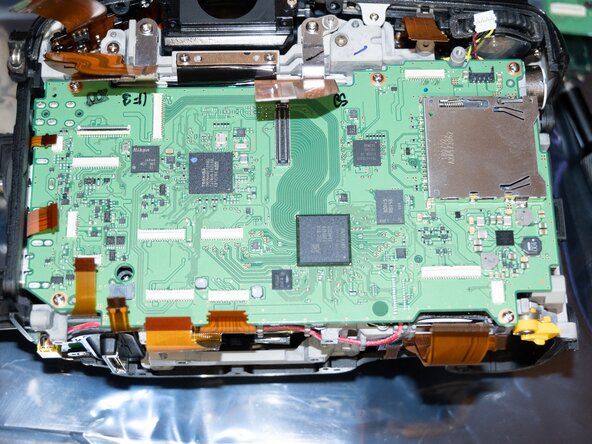
  • Time to get the connectors off the main board!

  • All the connectors with red arrows are the same style as the rear cover connector. Flip up the latch at the rear of the connector and the cable will come out easily.

  • The blue connector is the main image sensor connector. It pulls straight up off the board "like a little lego".

  • The purple connector is easiest to remove by placing tweezers under the connector where the wires come out, and prying straight up. It comes out vertically but is "clipped" in.

  • These yellow guys are the dangerous ones. They press into the connector from the side without a latch. The cables have small "ears" on them to help pull them out and insert them but use extreme care removing these cables from the board. They require some force to remove from the connectors.

  • The connectors on the upper left and lower right are layered. Be sure to reconnect the new mainboard to the cables in the correct order!

È arrivato il momento di togliere i connettori dalla scheda madre!

Tutti i connettori indicati con le frecce rosse sono dello stesso stile del connettore del coperchio posteriore. Solleva il fermo sul retro del connettore e il cavo uscirà facilmente.

Il connettore blu è il connettore principale del sensore di immagine. Si stacca dalla scheda madre direttamente "come un piccolo Lego".

Il connettore viola è più facile da rimuovere posizionando una pinzetta sotto il connettore dove escono i fili e facendo leva verso l'alto. Esce verticalmente ma è "incastrato".

Questi cavi gialli sono quelli pericolosi. Premono nel connettore lateralmente senza un fermo. I cavi hanno delle piccole "orecchie" per facilitarne l'estrazione e l'inserimento, ma fate molta attenzione quando li togli dalla scheda madre. Richiede una certa forza per rimuoverli dai connettori.

I connettori in alto a sinistra e in basso a destra sono a strati. Assicurati di ricollegare la nuova scheda madre ai cavi nell'ordine corretto!

crwdns2944171:0crwdnd2944171:0crwdnd2944171:0crwdnd2944171:0crwdne2944171:0