crwdns2933423:0crwdne2933423:0

Het vervangen van een plastic gesp

crwdns2936315:0crwdne2936315:0
crwdns2936313:0crwdne2936313:0
crwdns2931653:04crwdne2931653:0
Plastic Buckle Replacement, Install the new buckle piece and test its functionality: crwdns2935265:00crwdnd2935265:01crwdnd2935265:03crwdne2935265:0 Plastic Buckle Replacement, Install the new buckle piece and test its functionality: crwdns2935265:00crwdnd2935265:02crwdnd2935265:03crwdne2935265:0 Plastic Buckle Replacement, Install the new buckle piece and test its functionality: crwdns2935265:00crwdnd2935265:03crwdnd2935265:03crwdne2935265:0
Install the new buckle piece and test its functionality
  • Check the notes or reference photo from Step 1 to make sure the orientation is correct.

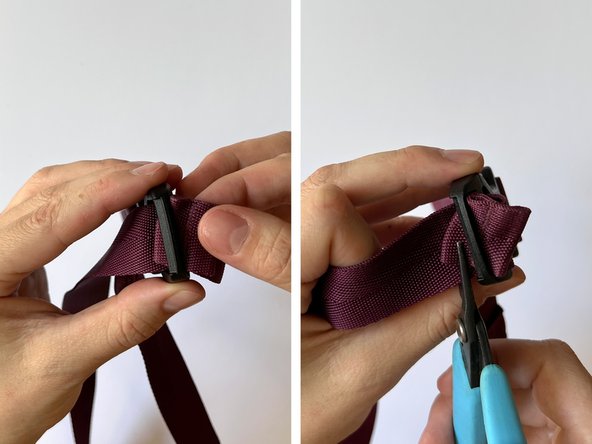
  • Repeat the technique used in Step 3 in reverse by feeding one corner of the folded webbing end into the buckle piece slot first, then using pliers to pull it all the way through.

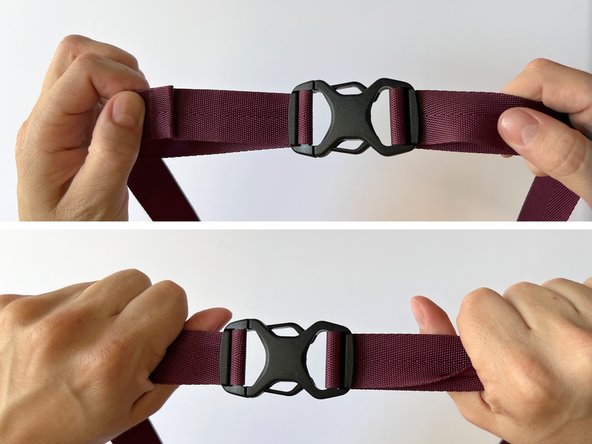
  • Pull the webbing on each side of the buckle to ensure that it holds tension on the new piece. If the webbing slides, it may be threaded incorrectly.

Bekijk indien nodig de foto die je in stap 1 hebt gemaakt om zeker te weten dat je de gesp goed plaatst.

Herhaal de techniek in stap 3 in omgekeerde volgorde door eerst een kant van de gevouwen strap door de sleuf te duwen en die vervolgens met een punttang door de sleuf te trekken.

Controleer of de gesp goed werkt door beide straps van elkaar af te trekken.

crwdns2944171:0crwdnd2944171:0crwdnd2944171:0crwdnd2944171:0crwdne2944171:0