crwdns2933423:0crwdne2933423:0

플라스틱 버클 교체

crwdns2936315:0crwdne2936315:0
crwdns2936325:0crwdne2936325:0
crwdns2931653:04crwdne2931653:0
Plastic Buckle Replacement, Install the new buckle piece and test its functionality: crwdns2935265:00crwdnd2935265:01crwdnd2935265:03crwdne2935265:0 Plastic Buckle Replacement, Install the new buckle piece and test its functionality: crwdns2935265:00crwdnd2935265:02crwdnd2935265:03crwdne2935265:0 Plastic Buckle Replacement, Install the new buckle piece and test its functionality: crwdns2935265:00crwdnd2935265:03crwdnd2935265:03crwdne2935265:0
Install the new buckle piece and test its functionality
  • Check the notes or reference photo from Step 1 to make sure the orientation is correct.

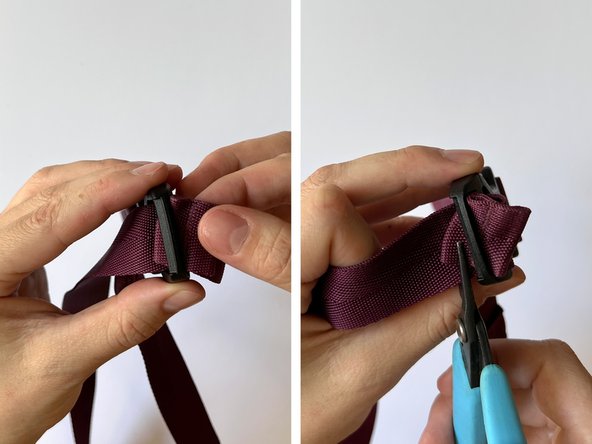
  • Repeat the technique used in Step 3 in reverse by feeding one corner of the folded webbing end into the buckle piece slot first, then using pliers to pull it all the way through.

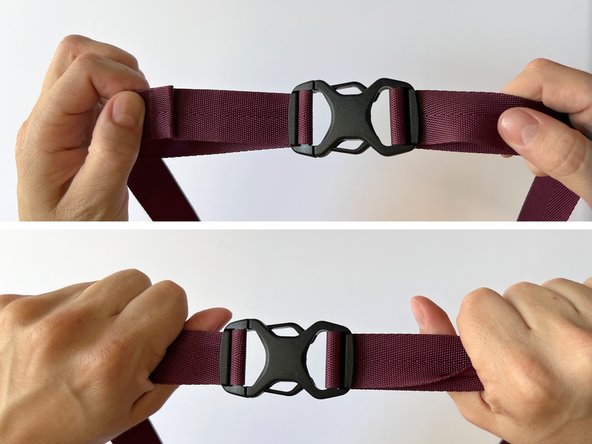
  • Pull the webbing on each side of the buckle to ensure that it holds tension on the new piece. If the webbing slides, it may be threaded incorrectly.

1 단계의 메모 또는 사진을 참고하여 방향이 올바른지 확인하세요.

접힌 웨빙 끝의 한쪽 모서리를 버클 슬롯에 먼저 넣은 다음 펜치를 사용하여 끝까지 잡아 당겨서 3 단계에서 사용한 기술을 역으로 반복하세요.

버클 양쪽의 웨빙을 당겨서 새 버클의 고정력을 확인하세요. 웨빙이 미끄러지면 잘못 끼워진 것일 수 있습니다.

crwdns2944171:0crwdnd2944171:0crwdnd2944171:0crwdnd2944171:0crwdne2944171:0