crwdns2931529:0crwdnd2931529:0crwdnd2931529:0crwdnd2931529:02crwdnd2931529:0crwdne2931529:0
crwdns2935425:08crwdne2935425:0


-
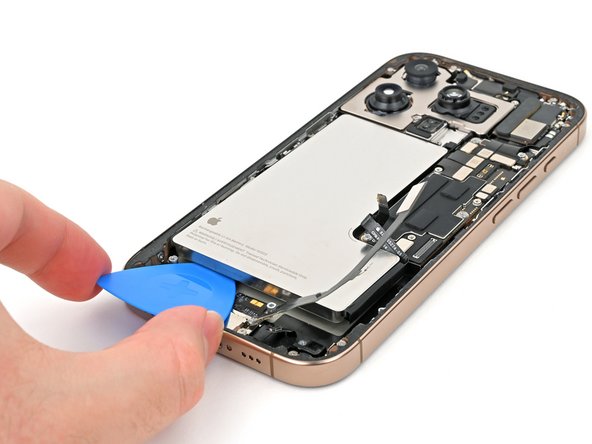
Insert the tip of an opening pick between the bottom of the battery and the frame.
-
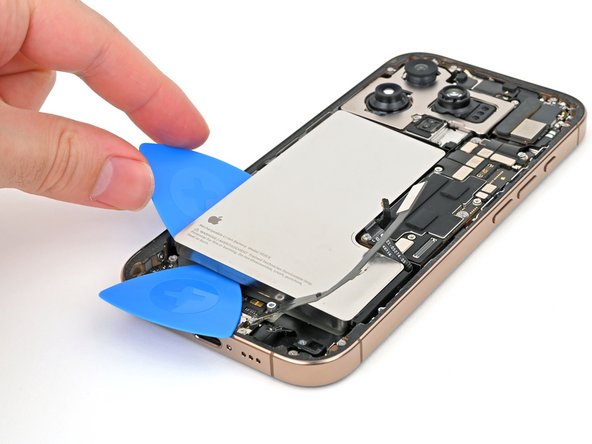
Insert a second opening pick between the left edge of the battery and the frame. Use this pick to pry the battery upwards slowly with steady force. Work your way up the edge of the battery, giving the adhesive time to release.
-
Once the adhesive loosens, grab and remove the battery.
-
Clean the frame with isopropyl alcohol and a lint-free or microfiber cloth. Wait for the alcohol to fully evaporate before installing the new battery.
-
Before applying adhesive, place it in its recess to check if it fits and that the cable reaches its socket on the logic board. Don't reconnect the battery yet.
| [* black] Insert the tip of an opening pick between the bottom of the battery and the frame. | |
| - | [* black] Insert a second opening pick between the left edge of the battery and the frame. Use this pick to pry the battery upwards slowly with steady force. |
| + | [* black] Insert a second opening pick between the left edge of the battery and the frame. Use this pick to pry the battery upwards slowly with steady force. Work your way up the edge of the battery, giving the adhesive time to release. |
| [* icon_caution] Don't bend or crease the battery. If it feels stubborn, apply a few more drops of isopropyl alcohol and try again. | |
| [* black] Once the adhesive loosens, grab and remove the battery. | |
| [* icon_reminder] To install a new battery: | |
| - | [* black] Clean |
| + | [* black] Clean the frame with isopropyl alcohol and a lint-free or microfiber cloth. Wait for the alcohol to fully evaporate before installing the new battery. |
| [* black] ***Before applying adhesive***, place it in its recess to check if it fits and that the cable reaches its socket on the logic board. Don't reconnect the battery yet. | |
| [* icon_note] If your new battery doesn't have adhesive installed, [guide|137171|follow this guide|new_window=true] to apply new [product|IF145-458|stretch release adhesive strips|new_window=true], or use [product|IF317-072-2|thin, double-sided tape|new_window=true] to secure it. We recommend using stretch release adhesive for easier removal. |
crwdns2944171:0crwdnd2944171:0crwdnd2944171:0crwdnd2944171:0crwdne2944171:0