crwdns2931527:0crwdnd2931527:0crwdnd2931527:0crwdnd2931527:0crwdne2931527:0
crwdns2935425:03crwdne2935425:0
crwdns2931653:03crwdne2931653:0


-
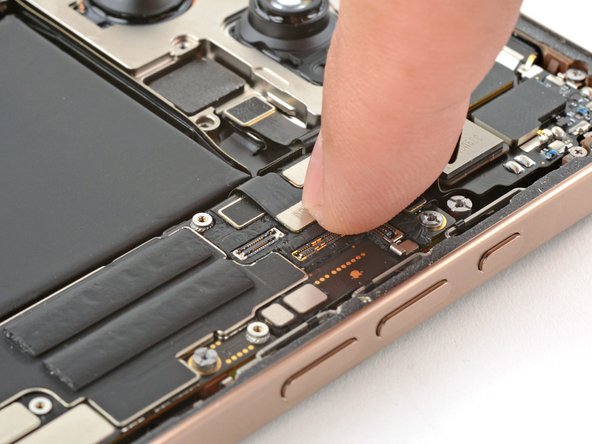
Use your finger or a spudger to press and connect the two camera connectors onto the logic board.
| - | [title] Remove the rear camera assembly |
|---|---|
| - | [* black] Use the point of a spudger to pry up and disconnect the first rear camera connector. |
| - | [* black] Disconnect the second camera connector underneath the first connector. |
| + | [* black] Use your finger or a spudger to press and connect the two camera connectors onto the logic board. |
| + | [* icon_note] To re-attach [guide|25629|press connectors|stepid=70308|new_window=true] like this one, carefully align and press down on one side until it clicks into place, then repeat on the other side. Don't press down in the middle. If the connector is misaligned, the pins can bend, causing permanent damage. |
crwdns2944171:0crwdnd2944171:0crwdnd2944171:0crwdnd2944171:0crwdne2944171:0