crwdns2933423:0crwdne2933423:0

MODRETRO Chromatic Disassembly

crwdns2936315:0crwdne2936315:0
crwdns2936323:0crwdne2936323:0
crwdns2931653:05crwdne2931653:0
MODRETRO Chromatic Disassembly, PCB: crwdns2935265:00crwdnd2935265:01crwdnd2935265:03crwdne2935265:0 MODRETRO Chromatic Disassembly, PCB: crwdns2935265:00crwdnd2935265:02crwdnd2935265:03crwdne2935265:0 MODRETRO Chromatic Disassembly, PCB: crwdns2935265:00crwdnd2935265:03crwdnd2935265:03crwdne2935265:0
PCB
  • Remove the PCB screw (x1) using a Tri-wing Y1 Screwdriver.

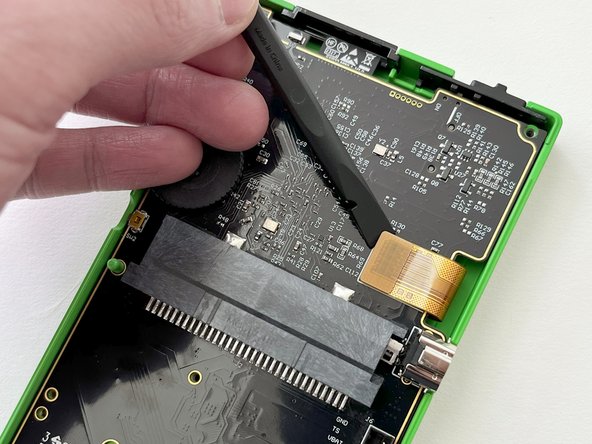
  • Carefully lift the LCD screen ribbon cable from the PCB.

  • Handle with care!

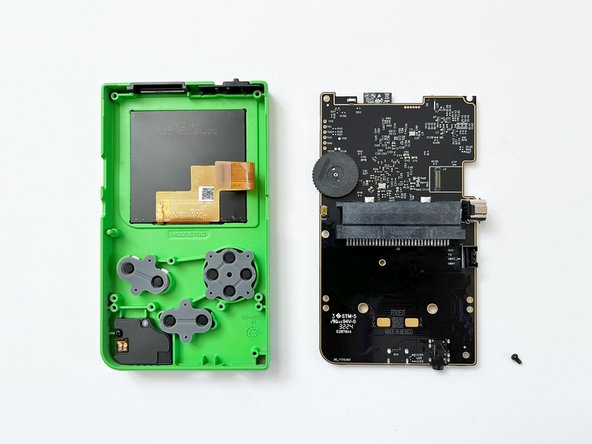
  • Carefully remove the PCB from the front shell.

  • Lifting at a slight angle will help clear the headphone jack on the bottom more easily. This is also important during re-assembly.

crwdns2935429:0crwdne2935429:0

crwdns2935429:0crwdne2935429:0

crwdns2935429:0crwdne2935429:0

crwdns2935429:0crwdne2935429:0

crwdns2935429:0crwdne2935429:0

crwdns2944171:0crwdnd2944171:0crwdnd2944171:0crwdnd2944171:0crwdne2944171:0