crwdns2933423:0crwdne2933423:0

Het vervangen van de schermmodule van de HP EliteBook 840 Aero G8

crwdns2931529:0crwdnd2931529:0crwdnd2931529:0crwdnd2931529:05crwdnd2931529:0crwdne2931529:0

crwdns2935425:06crwdne2935425:0

crwdns2936315:0crwdne2936315:0
crwdns2936313:0crwdne2936313:0
crwdns2931653:06crwdne2931653:0
HP EliteBook 840 Aero G8 Display Assembly Replacement, Remove the display assembly: crwdns2935265:00crwdnd2935265:01crwdnd2935265:03crwdne2935265:0 HP EliteBook 840 Aero G8 Display Assembly Replacement, Remove the display assembly: crwdns2935265:00crwdnd2935265:02crwdnd2935265:03crwdne2935265:0 HP EliteBook 840 Aero G8 Display Assembly Replacement, Remove the display assembly: crwdns2935265:00crwdnd2935265:03crwdnd2935265:03crwdne2935265:0
Remove the display assembly
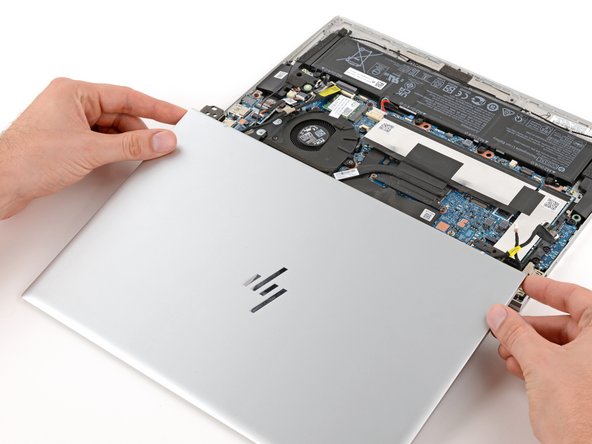
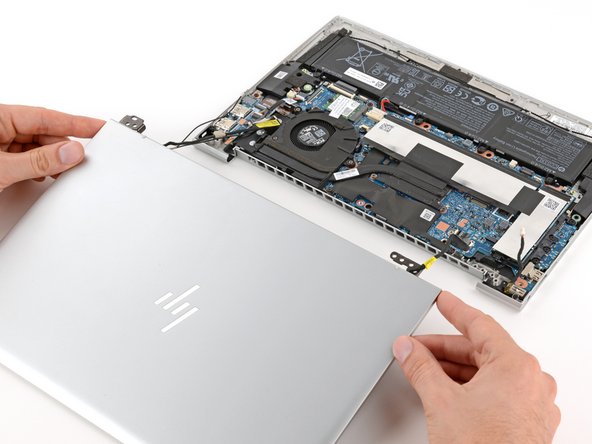
  • Grip the display assembly near the hinges and lift straight up to remove it.

  • You may need to hold down the main body while guiding the hinges out of their recesses.

  • During reassembly, make sure both hinges on your replacement display assembly are fully open before lowering them into their recesses.

Pak de schermmodule bij de scharnieren vast en til de module recht omhoog.

Mogelijk moet je de rest van de laptop tegenhouden terwijl je de schermmodule lostrekt.

Zorg dat de beide scharnieren van de nieuwe schermmodule volledig opengeklapt zijn voordat je ze in de uitsparingen in de laptop plaatst.

crwdns2944171:0crwdnd2944171:0crwdnd2944171:0crwdnd2944171:0crwdne2944171:0