crwdns2933423:0crwdne2933423:0

Changement écran complet HP EliteBook 840 Aero G8

crwdns2931529:0crwdnd2931529:0crwdnd2931529:0crwdnd2931529:05crwdnd2931529:0crwdne2931529:0

crwdns2935425:06crwdne2935425:0

crwdns2936315:0crwdne2936315:0
crwdns2936317:0crwdne2936317:0
crwdns2931653:06crwdne2931653:0
HP EliteBook 840 Aero G8 Display Assembly Replacement, Remove the display assembly: crwdns2935265:00crwdnd2935265:01crwdnd2935265:03crwdne2935265:0 HP EliteBook 840 Aero G8 Display Assembly Replacement, Remove the display assembly: crwdns2935265:00crwdnd2935265:02crwdnd2935265:03crwdne2935265:0 HP EliteBook 840 Aero G8 Display Assembly Replacement, Remove the display assembly: crwdns2935265:00crwdnd2935265:03crwdnd2935265:03crwdne2935265:0
Remove the display assembly
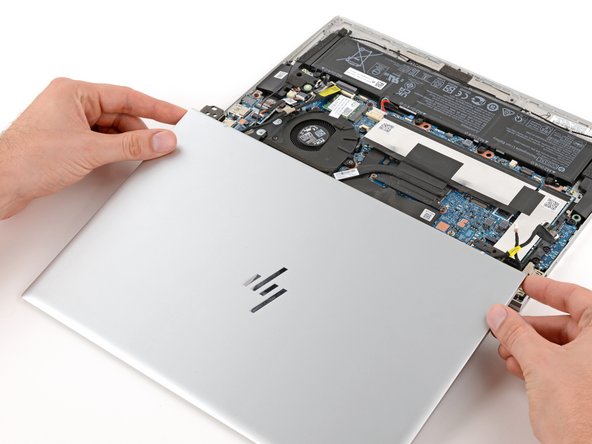
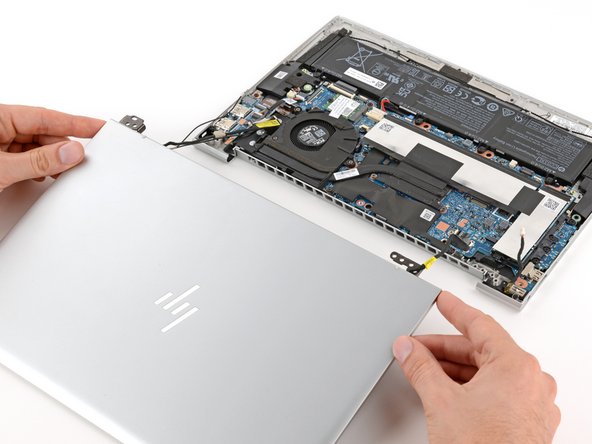
  • Grip the display assembly near the hinges and lift straight up to remove it.

  • You may need to hold down the main body while guiding the hinges out of their recesses.

  • During reassembly, make sure both hinges on your replacement display assembly are fully open before lowering them into their recesses.

Saisissez l'écran près des charnières et soulevez-le à la verticale pour le retirer.

Il faudra peut-être maintenir l’autre moitié de l’ordinateur tout en guidant les charnières hors de leurs logements.

Lors du remontage, assurez-vous que les deux charnières de l'écran complet de remplacement sont complètement ouvertes avant de les insérer dans leurs logements.

crwdns2944171:0crwdnd2944171:0crwdnd2944171:0crwdnd2944171:0crwdne2944171:0