crwdns2933423:0crwdne2933423:0

HP EliteBook 840 Aero G8 팬 교체

crwdns2931529:0crwdnd2931529:0crwdnd2931529:0crwdnd2931529:02crwdnd2931529:0crwdne2931529:0

crwdns2935425:04crwdne2935425:0

crwdns2936315:0crwdne2936315:0
crwdns2936325:0crwdne2936325:0
crwdns2931653:04crwdne2931653:0
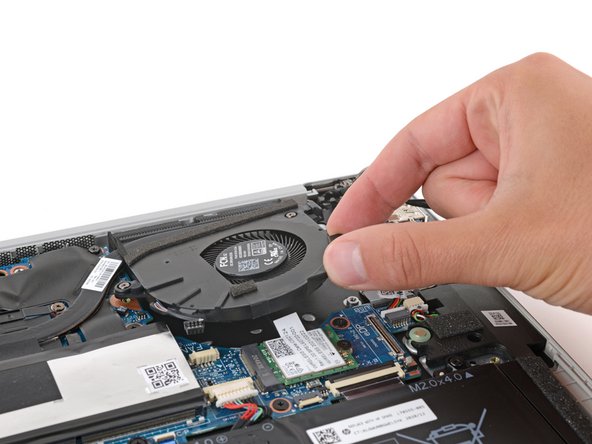
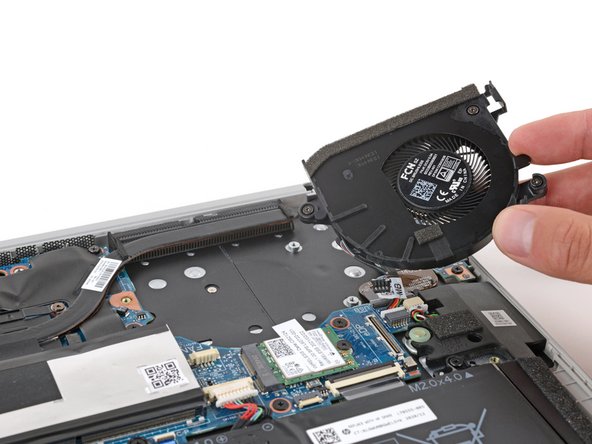
HP EliteBook 840 Aero G8 Fan Replacement, Remove the fan: crwdns2935265:00crwdnd2935265:01crwdnd2935265:03crwdne2935265:0 HP EliteBook 840 Aero G8 Fan Replacement, Remove the fan: crwdns2935265:00crwdnd2935265:02crwdnd2935265:03crwdne2935265:0 HP EliteBook 840 Aero G8 Fan Replacement, Remove the fan: crwdns2935265:00crwdnd2935265:03crwdnd2935265:03crwdne2935265:0
Remove the fan
  • Lift up the right edge of the fan.

  • Slide the fan towards the right edge of the laptop to pull the top left corner out from under the heat sink.

  • Remove the fan.

  • During reassembly, make sure the top left corner of the fan slides under the heat sink.

팬의 오른쪽 가장자리를 들어 올리세요.

팬을 노트북의 오른쪽 가장자리를 향해 당겨 방열판 아래에서 왼쪽 상단 모서리를 밀어내세요.

팬을 분리하세요.

재조립할 때, 팬의 왼쪽 상단 모서리가 방열판 아래로 미끄러지는지 확인하세요.

crwdns2944171:0crwdnd2944171:0crwdnd2944171:0crwdnd2944171:0crwdne2944171:0