crwdns2933423:0crwdne2933423:0

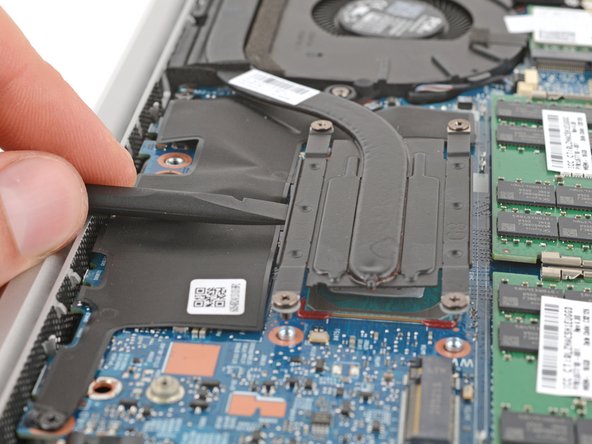
Het loswrikken van het koellichaam van de HP EliteBook 840 Aero G8

crwdns2931529:0crwdnd2931529:0crwdnd2931529:0crwdnd2931529:03crwdnd2931529:0crwdne2931529:0

crwdns2935425:02crwdne2935425:0

crwdns2936315:0crwdne2936315:0
crwdns2936313:0crwdne2936313:0
crwdns2931653:02crwdne2931653:0
HP EliteBook 840 Aero G8 Heat Sink Prying, Pry up the heat sink: crwdns2935265:00crwdnd2935265:01crwdnd2935265:02crwdne2935265:0 HP EliteBook 840 Aero G8 Heat Sink Prying, Pry up the heat sink: crwdns2935265:00crwdnd2935265:02crwdnd2935265:02crwdne2935265:0
Pry up the heat sink
  • Be very careful not to pry on or damage any of the delicate surface‑mounted components around the heat sink.

  • Use the flat end of a spudger to pry up the top edge of the heat sink.

  • Thermal paste bonds the heat sink to the CPU. Depending on the age of your device and condition of the thermal paste, this may take some force. Pull up with constant, steady force to peel the heat sink away from the board.

Ga voorzichtig te werk en voorkom dat je de onderdelen rondom het koellichaam per ongeluk loswrikt.

Gebruik de platte kant van je spudger om de bovenkant van het koellichaam omhoog te wrikken.

Het koellichaam is met koelpasta op de CPU bevestigd. Afhankelijk van hoe oud en in welke staat de koelpasta is, heb je hier mogelijk aardig wat kracht voor nodig. Trek het koellichaam met een constante kracht omhoog om 'm van de koelpasta af te trekken.

crwdns2944171:0crwdnd2944171:0crwdnd2944171:0crwdnd2944171:0crwdne2944171:0