crwdns2931527:0crwdnd2931527:0crwdnd2931527:0crwdnd2931527:0crwdne2931527:0
crwdns2935425:03crwdne2935425:0
crwdns2931653:03crwdne2931653:0

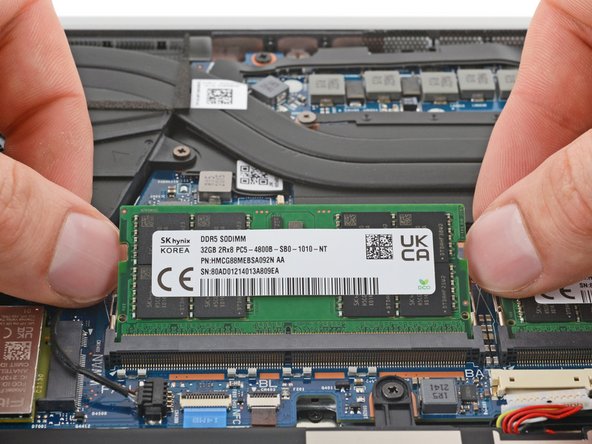
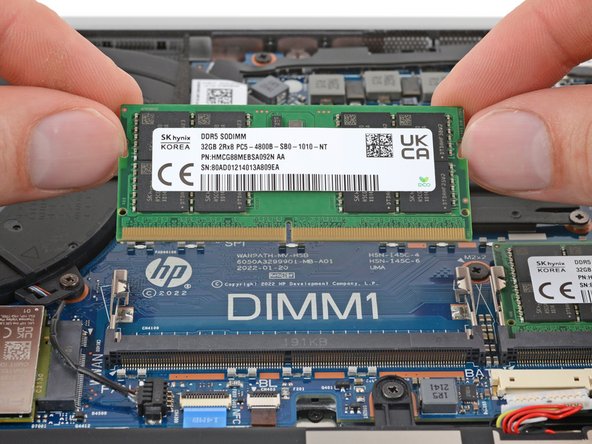


Remove the memory module
-
Simultaneously push out the metal arms on each side of the memory module until they disengage and the module pops up at a slight angle.
-
Pull the module out of its socket to remove it.
-
Use the same process to remove the other memory module.
crwdns2944171:0crwdnd2944171:0crwdnd2944171:0crwdnd2944171:0crwdne2944171:0