crwdns2935425:06crwdne2935425:0


-
Take the new 0402 fuse with a pair of tweezers and solder it back in a similar manner to the removal of the old fuse.
-
If you do not have or want to use a fuse you can simply bridge the 2 contact points and it will work the same without issues. But it is better to be on the safer side by replacing it.
-
At this point you should use a multimeter on any of the capacitors present to check for a short/continuity. If you do not hear anything, then you can plug the charger in, and the white light should reappear, with the charger working well.
-
If you have plugged the charger in without checking for continuity, you will get a yellow/red/orange led, with the charging chip heating up, which means that there is a short on one of the capacitors. That's why I recommend first to check the continuity.
-
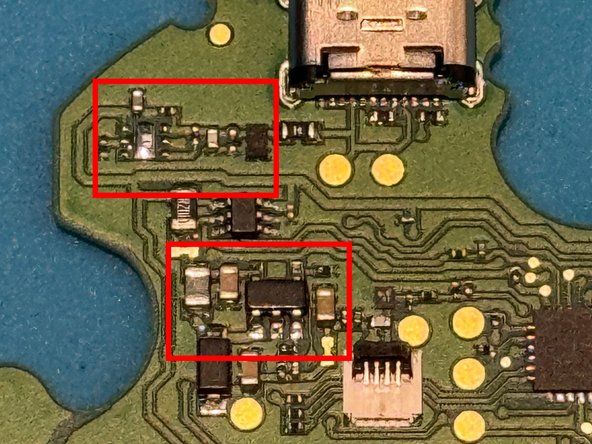
The second image has 2 red rectangles, any one of those capaciors could be burnt out. So what you have to do is remove them 1 by 1, until the short disappears, always checking with the multimeter. In my case, 1 charger was the fuse, one was that with the decoupling ceramic capacitor near the fuse (the black one). A 0.1uF 0603 SMD will do just fine.
crwdns2944171:0crwdnd2944171:0crwdnd2944171:0crwdnd2944171:0crwdne2944171:0