crwdns2933423:0crwdne2933423:0

Changement pile RTC HP EliteBook 840 G9

crwdns2931527:0crwdnd2931527:0crwdnd2931527:0crwdnd2931527:0crwdne2931527:0

crwdns2935425:03crwdne2935425:0

crwdns2936315:0crwdne2936315:0
crwdns2936317:0crwdne2936317:0
crwdns2931653:03crwdne2931653:0
HP EliteBook 840 G9 RTC Battery Replacement, Remove the RTC battery: crwdns2935265:00crwdnd2935265:01crwdnd2935265:03crwdne2935265:0 HP EliteBook 840 G9 RTC Battery Replacement, Remove the RTC battery: crwdns2935265:00crwdnd2935265:02crwdnd2935265:03crwdne2935265:0 HP EliteBook 840 G9 RTC Battery Replacement, Remove the RTC battery: crwdns2935265:00crwdnd2935265:03crwdnd2935265:03crwdne2935265:0
Remove the RTC battery
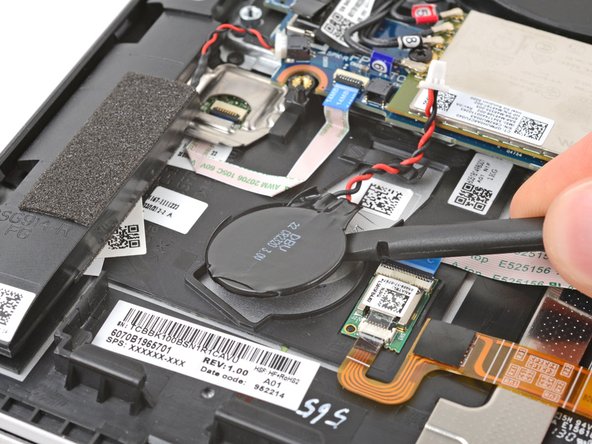
  • Use the flat end of a spudger to gently pry up the RTC battery, separating the adhesive securing it to the frame.

  • Remove the RTC battery.

  • During reassembly:

  • When installing a new RTC battery, make sure the cable is facing its socket on the motherboard.

  • If your replacement battery comes with adhesive pre‑installed, remove the old adhesive from the frame before installing the new battery.

  • If it doesn't, you can reuse the adhesive if it's still sticky. If you need to replace the adhesive, use thin, double‑sided tape to secure your new battery.

Utilisez l'extrémité plate d'une spatule pour soulever délicatement la pile RTC et la décoller de l'adhésif qui la fixe au châssis.

Enlevez la pile RTC.

Lors du remontage :

Vérifiez que le câble de la pile RTC est bien orienté vers sa prise sur la carte mère.

Si votre pile de rechange est livrée avec un adhésif préinstallé, nettoyez l'ancien adhésif du châssis avant de la poser.

Si ce n'est pas le cas et que l'adhésif est encore collant, vous pouvez le réutiliser. Si vous devez remplacer l'adhésif, utilisez du ruban adhésif double-face fin pour fixer votre nouvelle pile.

crwdns2944171:0crwdnd2944171:0crwdnd2944171:0crwdnd2944171:0crwdne2944171:0