crwdns2933423:0crwdne2933423:0

HP EliteBook 840 G9 底面カバーの交換

crwdns2931529:0crwdnd2931529:0crwdnd2931529:0crwdnd2931529:033crwdnd2931529:0crwdne2931529:0

crwdns2935425:05crwdne2935425:0

crwdns2936315:0crwdne2936315:0
crwdns2936323:0crwdne2936323:0
crwdns2931653:05crwdne2931653:0
HP EliteBook 840 G9 Bottom Cover Replacement, Remove the bottom cover: crwdns2935265:00crwdnd2935265:01crwdnd2935265:03crwdne2935265:0 HP EliteBook 840 G9 Bottom Cover Replacement, Remove the bottom cover: crwdns2935265:00crwdnd2935265:02crwdnd2935265:03crwdne2935265:0 HP EliteBook 840 G9 Bottom Cover Replacement, Remove the bottom cover: crwdns2935265:00crwdnd2935265:03crwdnd2935265:03crwdne2935265:0
Remove the bottom cover
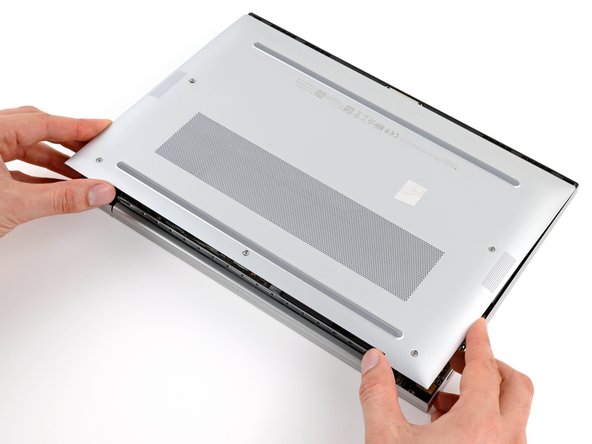
  • Slide the cover towards the screen hinge to disengage the clips on the opposite edge.

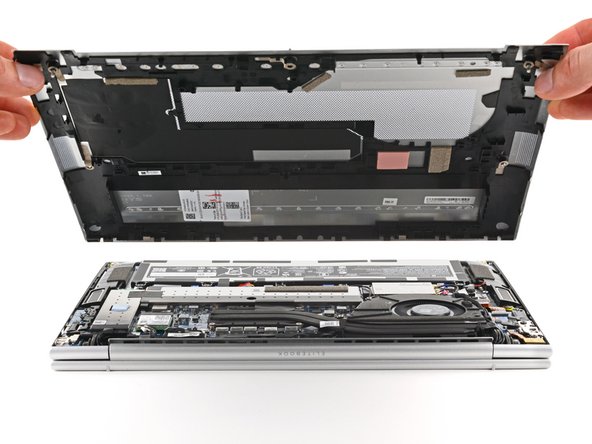
  • Lift and remove the cover.

  • The cover should come away easily. If you feel resistance, use the flat end of a spudger to release any remaining clips.

  • During reassembly, slide the clips along the front edge of the cover (opposite the hinge) into their slots on the frame, then lay the cover down. Firmly press around the perimeter of the cover to engage all the clips.

カバーをスクリーンのヒンジの方向にスライドさせて、反対側の縁にあるクリップを外します。

カバーを持ち上げて取り外します。

カバーは簡単に外れるはずです。抵抗を感じる場合は、スパッジャーの平らな先端を使用して、残りのクリップを外してください。

再組み立ての際は、カバーの前面の縁(ヒンジの反対側)に沿ってクリップをフレームのスロットにスライドさせてから、カバーを置きます。カバーの周囲をしっかりと押して、すべてのクリップをはめ込みます。

crwdns2944171:0crwdnd2944171:0crwdnd2944171:0crwdnd2944171:0crwdne2944171:0