crwdns2933423:0crwdne2933423:0

Xbox Series X ベースの交換

crwdns2931527:0crwdnd2931527:0crwdnd2931527:0crwdnd2931527:0crwdne2931527:0

crwdns2935425:01crwdne2935425:0

crwdns2936315:0crwdne2936315:0
crwdns2936323:0crwdne2936323:0
crwdns2931653:01crwdne2931653:0
Xbox Series X Base Replacement, Unlatch the base: crwdns2935265:00crwdnd2935265:01crwdnd2935265:03crwdne2935265:0 Xbox Series X Base Replacement, Unlatch the base: crwdns2935265:00crwdnd2935265:02crwdnd2935265:03crwdne2935265:0 Xbox Series X Base Replacement, Unlatch the base: crwdns2935265:00crwdnd2935265:03crwdnd2935265:03crwdne2935265:0
Unlatch the base
  • Before you begin, completely power down and unplug all cables from your console.

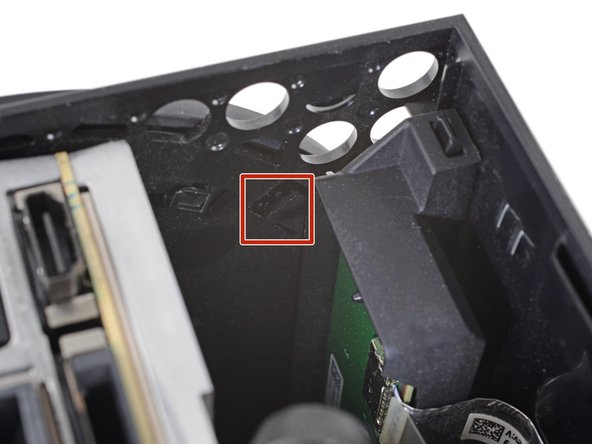
  • A locking tab on the bottom of the shell (under the base) holds the base in place.

  • You can access the tab through the vent holes on the back of your Xbox, but you may need a flashlight. Alternatively, you can remove the back panel for easier access.

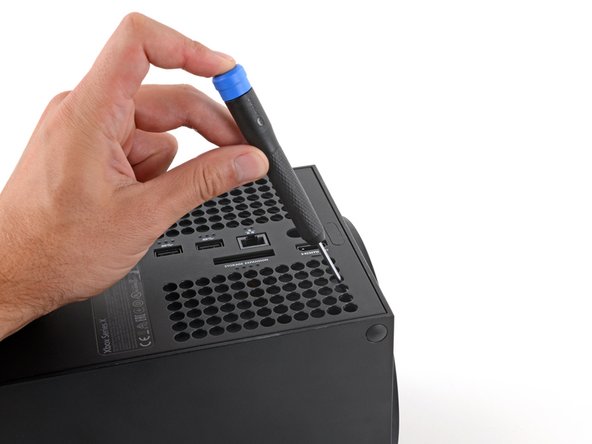
  • Stick a long, skinny flathead screwdriver through one of the vent holes on the back of your Xbox, near the locking tab.

  • Insert the screwdriver between the locking tab and the base. This might take a few tries—use a flashlight if you're having trouble.

  • Use the screwdriver to pry the tab inward (away from the base) into its open and unlocked position.

  • Keep the tab held open for the next step.

作業を始める前に、完全に電源を落とし、ゲームコンソールからすべてのケーブルを抜いてください。

シェルの底(ベースの下)にあるロックタブが、ベースを所定の位置に固定します。

Xboxの背面にある通気孔からこのタブにアクセスできますが、懐中電灯が必要な場合があります。あるいは、バックパネルを外してアクセスすることもできます。

細長いマイナスドライバーをXbox背面の通気孔の1つ、ロックタブの近くに刺します。

ドライバーをロックタブとベースの間に差し込みます。何度か試す必要があるかもしれません。

ドライバーでタブを内側にこじ開けます(ベースから離します)。

次の作業のために、タブを開いたままにしておきます。

crwdns2944171:0crwdnd2944171:0crwdnd2944171:0crwdnd2944171:0crwdne2944171:0