crwdns2933423:0crwdne2933423:0

迷你数字示波器 DIY 手工焊接套件

crwdns2936315:0crwdne2936315:0
crwdns2936311:0crwdne2936311:0
crwdns2931653:011crwdne2931653:0
Mini Digital Oscilloscope DIY Soldering Kit Assembly: crwdns2935265:00crwdnd2935265:01crwdnd2935265:03crwdne2935265:0 Mini Digital Oscilloscope DIY Soldering Kit Assembly: crwdns2935265:00crwdnd2935265:02crwdnd2935265:03crwdne2935265:0 Mini Digital Oscilloscope DIY Soldering Kit Assembly: crwdns2935265:00crwdnd2935265:03crwdnd2935265:03crwdne2935265:0
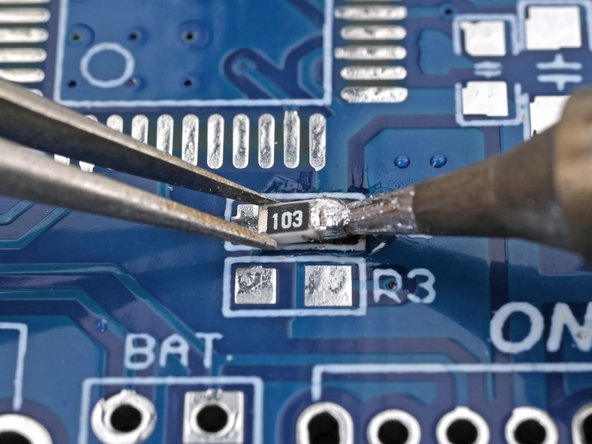
  • Place the smaller 10 kΩ resistor (labeled 103) in the outline labeled R2 on the board.

  • Press the soldering iron's tip onto the edge of the solder pad while holding the resistor in its outline, so that its end caps (the shiny parts) are resting on the circuit board's pads.

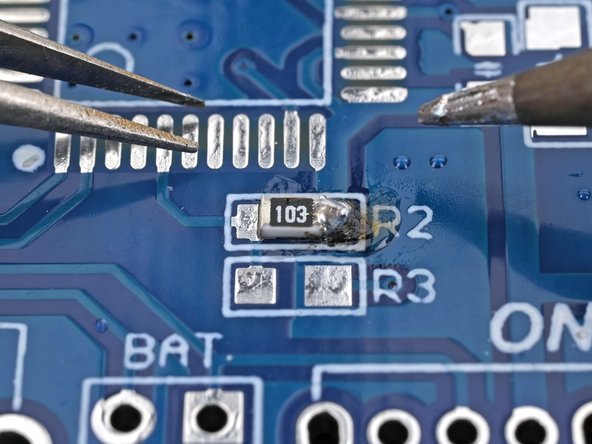
  • Remove the iron, then remove the tweezers once the solder has cooled.

将更小的 10 kΩ 电阻器(标有 103)放置于电路板上标有 R4 的丝印框位置。

在保持电阻器位于其轮廓内的同时,将烙铁头按压在焊盘的边缘,以使它的端帽(光亮部分)被焊在电路板的焊盘上。

先移开电烙铁,待焊料完全冷却后再松开镊子。

crwdns2944171:0crwdnd2944171:0crwdnd2944171:0crwdnd2944171:0crwdne2944171:0