crwdns2933423:0crwdne2933423:0

Reemplazo de batería del W-King X10

crwdns2931529:0crwdnd2931529:0crwdnd2931529:0crwdnd2931529:03crwdnd2931529:0crwdne2931529:0

crwdns2936315:0crwdne2936315:0
crwdns2936331:0crwdne2936331:0
crwdns2931653:06crwdne2931653:0
W-King X10 Battery Replacement: crwdns2935265:00crwdnd2935265:01crwdnd2935265:03crwdne2935265:0 W-King X10 Battery Replacement: crwdns2935265:00crwdnd2935265:02crwdnd2935265:03crwdne2935265:0 W-King X10 Battery Replacement: crwdns2935265:00crwdnd2935265:03crwdnd2935265:03crwdne2935265:0
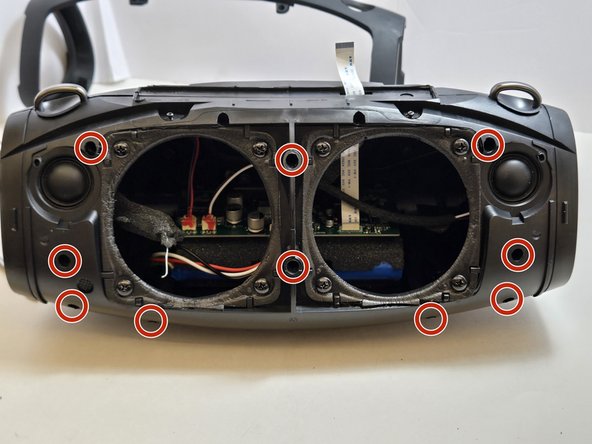
  • Use a 2.5 millimeter hex key to remove the ten 17.5 mm screws that connect the two halves of the X10 casing.

  • Several of these hex screws are in deep, narrow holes in the casing. We recommend using a full-length hex key rather than a hex bit at the end of a driver.

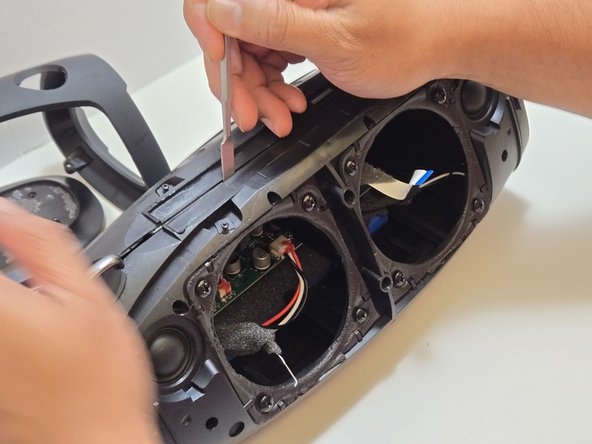
  • Separate the two halves of the casing using the metal spudger to pry apart the 10 connection arms that form the structure of the casing.

  • If this is the first time opening the casing of this X10, there will be glue around the seam of the casing. Use the spudger to split the glue to loosen the seam.

Utilice una llave hexagonal de 2,5 milímetros para quitar los diez tornillos de 17,5 mm que conectan las dos mitades de la carcasa X10.

Varios de estos tornillos hexagonales se encuentran en orificios profundos y estrechos de la carcasa. Recomendamos usar una llave hexagonal completa en lugar de una punta hexagonal en el extremo de un destornillador.

Separe las dos mitades de la carcasa usando la herramienta metálica spudger para separar los 10 brazos de conexión que forman la estructura de la carcasa.

Si es la primera vez que abres la carcasa de este X10, habrá pegamento alrededor de la costura. Usa la espátula para separar el pegamento y aflojar la costura.

crwdns2944171:0crwdnd2944171:0crwdnd2944171:0crwdnd2944171:0crwdne2944171:0