crwdns2933423:0crwdne2933423:0

Reemplazo del cristal trasero de iPhone 16

crwdns2931529:0crwdnd2931529:0crwdnd2931529:0crwdnd2931529:014crwdnd2931529:0crwdne2931529:0

crwdns2936315:0crwdne2936315:0
crwdns2936331:0crwdne2936331:0
crwdns2931653:08crwdne2931653:0
iPhone 16 Plus Back Glass Removal, Separate the left edge adhesive: crwdns2935265:00crwdnd2935265:01crwdnd2935265:03crwdne2935265:0 iPhone 16 Plus Back Glass Removal, Separate the left edge adhesive: crwdns2935265:00crwdnd2935265:02crwdnd2935265:03crwdne2935265:0 iPhone 16 Plus Back Glass Removal, Separate the left edge adhesive: crwdns2935265:00crwdnd2935265:03crwdnd2935265:03crwdne2935265:0
Separate the left edge adhesive
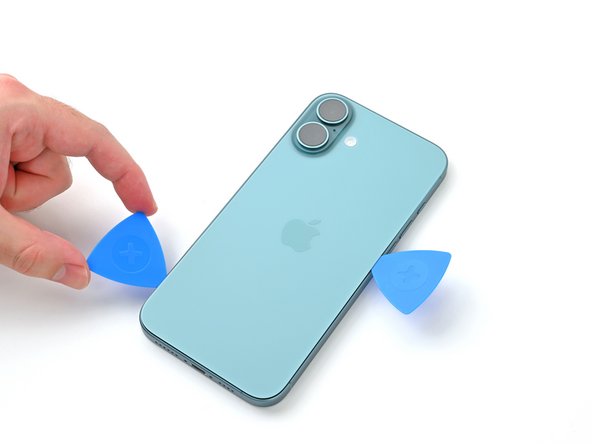
  • Don't insert your pick deeper than 5 mm along the left edge to avoid damaging the spring contact.

  • Insert a second opening pick at the bottom edge.

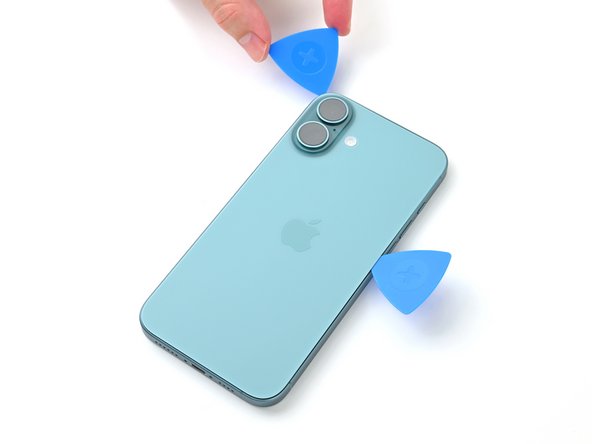
  • Slide the second pick around the bottom left corner and along the left edge of the screen to separate the adhesive and release the metal clips.

  • You'll hear and feel the metal clips release as you pass them.

  • Leave this pick inserted at the top left corner to prevent the adhesive from resealing.

No inserte la púa más allá de 5 mm a lo largo del borde izquierdo para evitar dañar el contacto del resorte.

Inserte una segunda púa de apertura en el borde inferior.

Deslice la segunda púa alrededor de la esquina inferior izquierda y a lo largo del borde izquierdo de la pantalla para separar el adhesivo y liberar los clips metálicos.

Oirás y sentirás cómo se liberan los clips metálicos al pasarlos.

Deje esta púa insertada en la esquina superior izquierda para evitar que el adhesivo se vuelva a sellar.

crwdns2944171:0crwdnd2944171:0crwdnd2944171:0crwdnd2944171:0crwdne2944171:0