crwdns2933423:0crwdne2933423:0

Roborock S8 MaxV Ultra: Teardown

crwdns2936315:0crwdne2936315:0
crwdns2936313:0crwdne2936313:0
crwdns2931653:02crwdne2931653:0
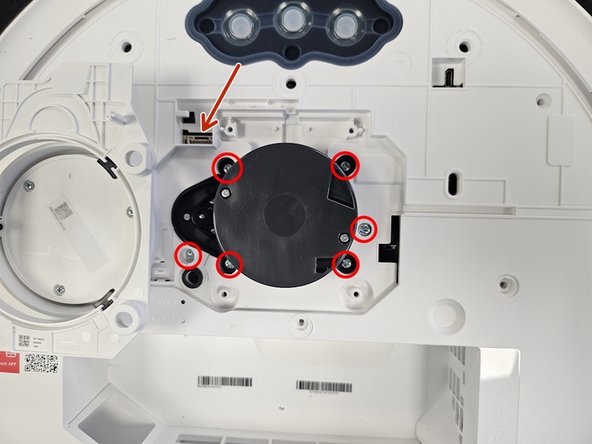
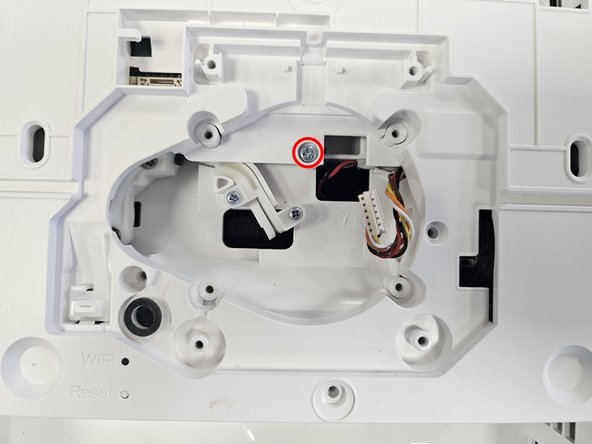
Roborock S8 MaxV Ultra: Teardown, Removing the LiDAR: crwdns2935265:00crwdnd2935265:01crwdnd2935265:03crwdne2935265:0 Roborock S8 MaxV Ultra: Teardown, Removing the LiDAR: crwdns2935265:00crwdnd2935265:02crwdnd2935265:03crwdne2935265:0 Roborock S8 MaxV Ultra: Teardown, Removing the LiDAR: crwdns2935265:00crwdnd2935265:03crwdnd2935265:03crwdne2935265:0
Removing the LiDAR
  • Start by removing the visible screws.

  • The bottom 4 are covered by plastic tabs that are glued on. Use your tweezers or box cutter/exacto knife to pry them off.

  • The top left is covered by a warranty sticker.

  • When removing the liDAR cage, be careful of the cable. It is connected on the left side.

  • When removing the LiDAR, be careful of the cable once again. It is connected to the PCB on the bottom of the LiDAR.

crwdns2935429:0crwdne2935429:0

crwdns2935429:0crwdne2935429:0

crwdns2935429:0crwdne2935429:0

crwdns2935429:0crwdne2935429:0

crwdns2935429:0crwdne2935429:0

crwdns2944171:0crwdnd2944171:0crwdnd2944171:0crwdnd2944171:0crwdne2944171:0