crwdns2933423:0crwdne2933423:0

Multifunktionale Powerstation Ausbau der UI-Platine

crwdns2931529:0crwdnd2931529:0crwdnd2931529:0crwdnd2931529:05crwdnd2931529:0crwdne2931529:0

crwdns2936315:0crwdne2936315:0
crwdns2936319:0crwdne2936319:0
crwdns2931653:03crwdne2931653:0
Portable Power Station UI Board Removal, Remove the main board supports: crwdns2935265:00crwdnd2935265:01crwdnd2935265:03crwdne2935265:0 Portable Power Station UI Board Removal, Remove the main board supports: crwdns2935265:00crwdnd2935265:02crwdnd2935265:03crwdne2935265:0 Portable Power Station UI Board Removal, Remove the main board supports: crwdns2935265:00crwdnd2935265:03crwdnd2935265:03crwdne2935265:0
Remove the main board supports
  • Flip your power station over.

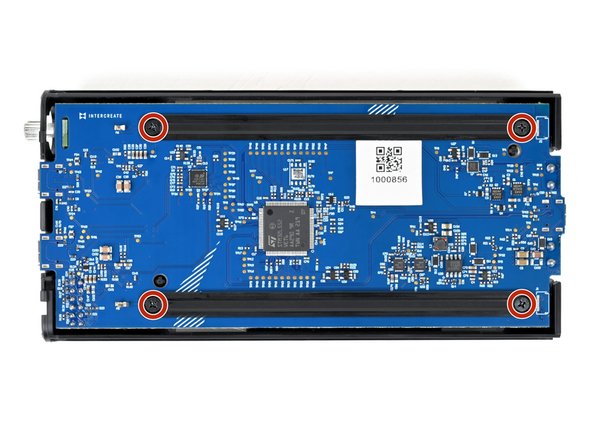
  • Use a Phillips screwdriver to remove the four 6 mm‑long screws securing the two main board supports.

  • Hold the supports in place while removing the final screws. Otherwise, the support may swing onto the board and damage the small, surface‑mounted components.

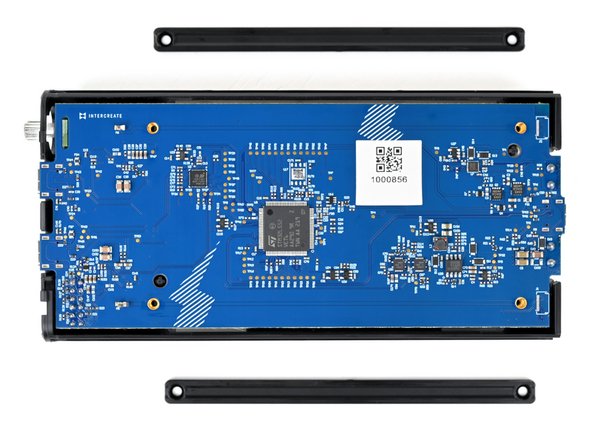
  • Remove the main board supports.

  • During reassembly, make sure the beveled sides of the main board support screw holes face up.

Drehe deine Powerstation um.

Verwende einen Kreuzschlitzschraubendreher, um die vier 6 mm langen Schrauben zu entfernen, mit denen die beiden Motherboard-Halterungen befestigt sind.

Halte die Halterungen fest, während du die letzten Schrauben entfernst. Andernfalls kann die Halterung auf die Platine schwingen und die kleinen, oberflächenmontierten Komponenten beschädigen.

Entferne die Motherboard-Halterungen.

Achte beim Wiederzusammenbau darauf, dass die abgeschrägten Seiten der Schraubenlöcher der Motherboard-Halterungen nach oben zeigen.

crwdns2944171:0crwdnd2944171:0crwdnd2944171:0crwdnd2944171:0crwdne2944171:0