crwdns2935425:04crwdne2935425:0
crwdns2931653:04crwdne2931653:0


Accessing the daughter board
-
With the shell removed, you can now access the majority of the components housed within the left earcup.
-
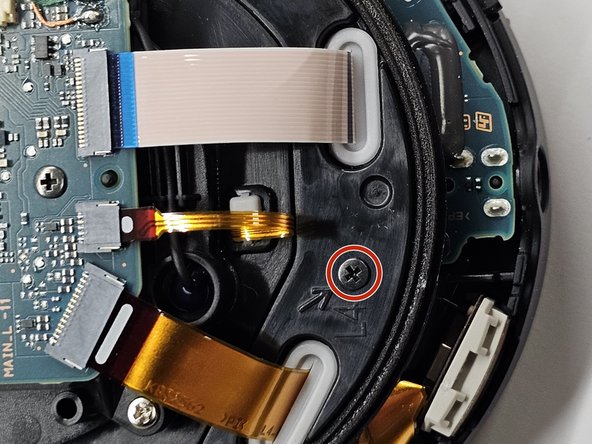
Locate the small screw located between the two ribbon cables. It is marked "L4" and identifiable by the arrow pointing directly at it. Using a Phillips #000 screwdriver, remove this screw.
-
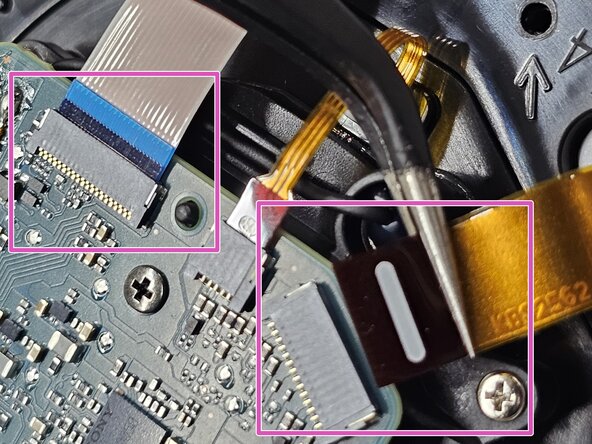
Carefully disconnect both ribbon cables from the top-most circuit board.
crwdns2944171:0crwdnd2944171:0crwdnd2944171:0crwdnd2944171:0crwdne2944171:0