crwdns2933423:0crwdne2933423:0

Sony WH-1000XM5 3.5mm ジャックの交換と異物の除去方法

crwdns2936315:0crwdne2936315:0
crwdns2936323:0crwdne2936323:0
crwdns2931653:04crwdne2931653:0
Sony WH-1000XM5 3.5mm Jack Replacement / Debris Removal, Accessing the daughter board: crwdns2935265:00crwdnd2935265:01crwdnd2935265:03crwdne2935265:0 Sony WH-1000XM5 3.5mm Jack Replacement / Debris Removal, Accessing the daughter board: crwdns2935265:00crwdnd2935265:02crwdnd2935265:03crwdne2935265:0 Sony WH-1000XM5 3.5mm Jack Replacement / Debris Removal, Accessing the daughter board: crwdns2935265:00crwdnd2935265:03crwdnd2935265:03crwdne2935265:0
Accessing the daughter board
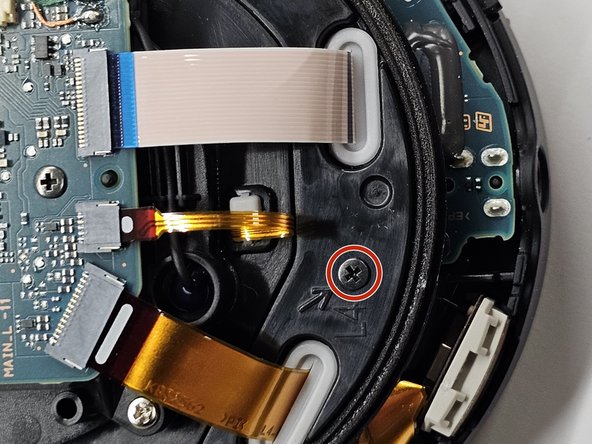
  • With the shell removed, you can now access the majority of the components housed within the left earcup.

  • Locate the small screw located between the two ribbon cables. It is marked "L4" and identifiable by the arrow pointing directly at it. Using a Phillips #000 screwdriver, remove this screw.

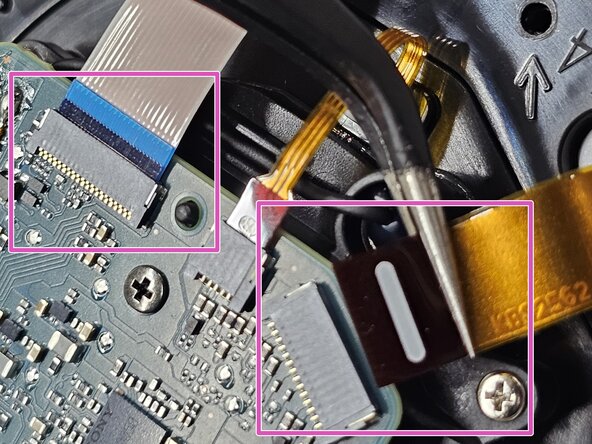
  • Carefully disconnect both ribbon cables from the top-most circuit board. Be careful not to bend or puncture either of these cables.

シェルを取り外すと、左側のイヤーカップ内に収められているほとんどの部品にアクセスできるようになります。

2つのリボンケーブルの間にある小さなネジを見つけてください。「L4」と印されており、直接それを指す矢印で識別できます。プラスドライバー#000を使用して、このネジを取り外してください。

最上部の回路基板から、両方のリボンケーブルを慎重に取り外してください。これらのケーブルを曲げたり、穴を開けたりしないように注意してください。

crwdns2944171:0crwdnd2944171:0crwdnd2944171:0crwdnd2944171:0crwdne2944171:0